Due to my recent
aquatic adventures, my 'makers mojo' and I have not been getting on too well. Something about me being unbalanced (go ahead, make your jokes now) and the concentration and constant looking down of stitching, made me a bit queasy, dizzy and blurry. Now that I am finally coming 'round a bit, I felt the need to make something - anything. I thought that I should start off small and simple. Then fortuitously, I received an email from a friend asking me to recommend some sewing projects that might be suitable for 10 year old girls. I sent her some links and then later, she asked if I had any ideas that could be accomplished by 3 girls during a crafty sleepover with beginning sewing machine skills. I thought about it for a while, and finally resorted to Feltycuffs. Do you see what I did there? Instead of 'Fistycuffs' I said...yes, well.
Felt is awesome, it's a no fuss, no muss material that makes up some seriously cool projects. It also ticks all the right boxes for a kid craft. However, once I started playing around with the felt, I started to imagine all the cool grown up stuff I could make using the same ideas.

The first thing I came up with was a woven felt wrist cuff/bracelet. I will be showing you in a brief, step by step tutorial how to make your own. So, here we go!
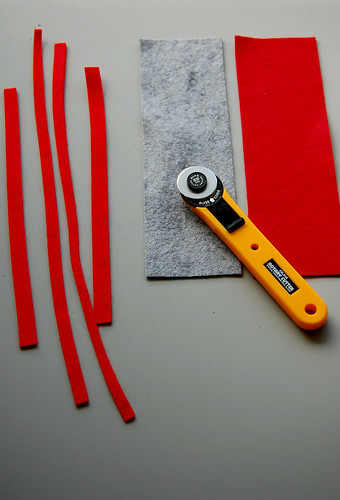
Gather up some felt scraps.
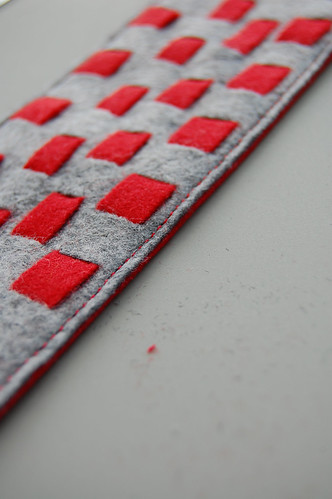
You will need 2 pieces for the main cuff part. You can measure your wrist with a tape measure, making sure it is not too tight but, a comfortable length on your wrist. Once you have that measurement, add 2 - 2.5 inches (5.5 - 6.4 cm) for overlap. I cut my pieces 8.25 inches (21 cm) long by 2.5 inches (6.4 cm) wide. Then cut some skinny strips of felt slightly longer than your main pieces. I cut 4 strips.
Using a rotary cutter and mat make this quick work, you can also use scissors.
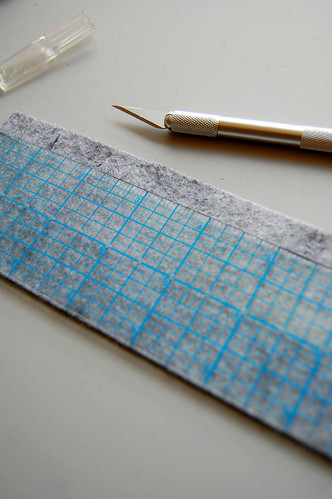
Now, working with the top piece of your main cuff (I used gray), use a craft knife* or small embroidery scissors, and a ruler to make 4 rows of small slits in the felt. To make this more even, you can place markings on the wrong side of the felt with a fabric marker. Make your slits just big enough for your skinny strips to fit through. I made my cuts every 1/2 inch (1.3 cm) along the length and in 4 rows across the width. I did not mark mine so they came out a bit wonky.
* If you are doing this project with kids, you will want to supervise use of the sharp craft knife.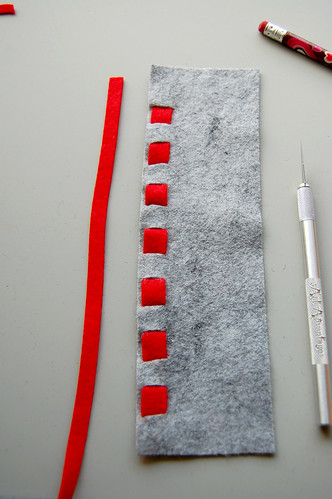
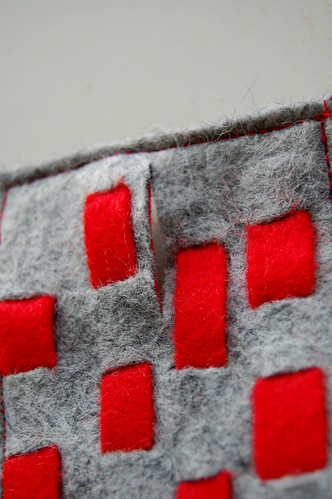
Now start weaving in your skinny strips. It's up to you if you want to alternate the pattern. Try to be fairly gentle, as you don't want to stretch out the felt too much.
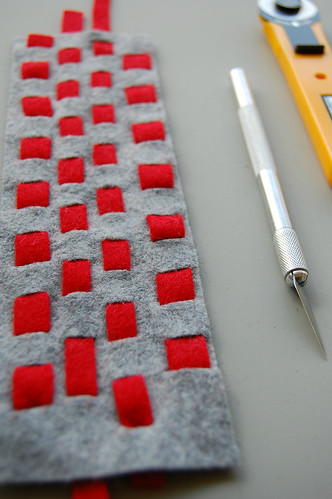
Once you have woven in all the strips, trim off any excess length.
I gave my finished piece a quick press with the iron before I continued.
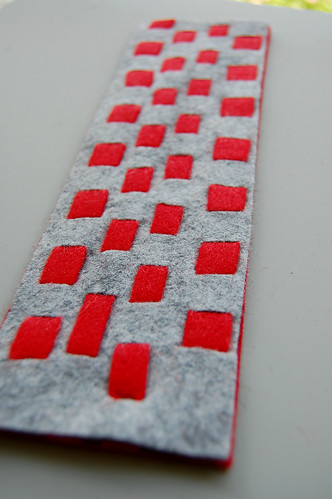
Next, Match the edges of your 2 cuff pieces, wrong sides together.
Using a simple straight stitch on your machine, sew around the outer edge, using 1/8 inch (0.3 cm) seam allowance.
In one end of your cuff, make a slit with a craft knife or scissors just big enough for your chosen button.
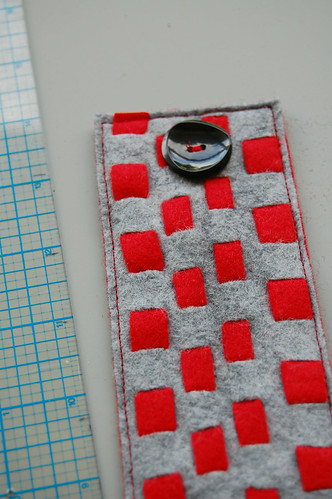
On the opposite end, sew on your button. Wrap the cuff around your wrist to help find the proper placement of the button.
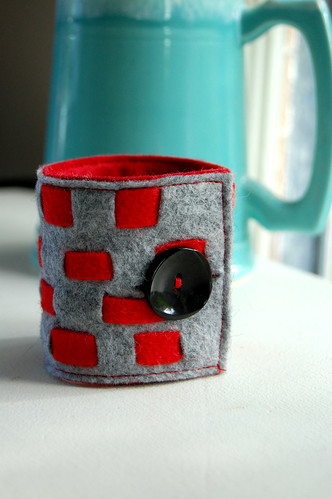
Ta Da! A super cool, super easy woven felt wrist cuff!
After I made this one, I couldn't stop. So, I made 2 Super Star cuffs for Pony Girl. I used the exact same technique for the cuffs but, without the woven element. I simply cut out 2 simple star shapes out of contrasting felt and appliqued them to the cuffs with a straight stitch.
Here is Pony Girl rockin' her cuffs!
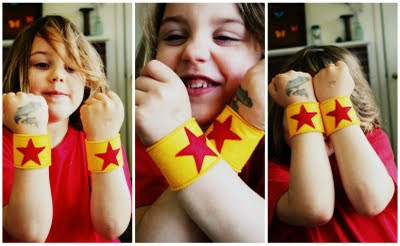 (click the pic for 10 times the awesome!)
 And I still couldn't stop!
What about a simple and elegant napkin ring? Does anyone use those anymore? I used to love looking at my mother's small collection of vintage napkin rings when I was a kid. I thought it would look so nice for a special dinner.

Wait, there's more!
What about place holders? These would be so pretty at a wedding, special party, or just because.
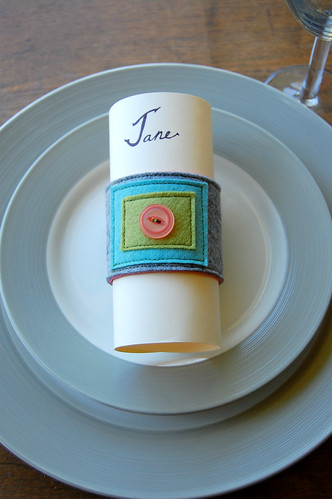

So yes, endless possibilities! I made one wrist cuff with a crochet flower sewn on that turned out lovely. It was too dark to photograph by that point. I keep thinking of other ways to use this very simple idea. How about you, can you think of some?
As always with my tutorials, please feel free to ask questions. And, if you make this project, or one inspired by this project, I would love it if you uploaded a photo to the
"Lola By You" flickr group!
Have a super star day!
Oh, I almost forgot. Lola has a new
Facebook page come check it out!

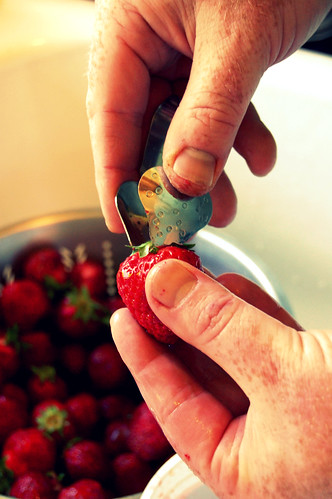
 A lot of you commented on or asked about the little tool from my jam post. It's called a strawberry Huller. We bought ours at a local market but, I happened to find it on line in case anyone else is interested. You can find it at cheftools.com for a mere $2.50.