
Recently, I attended a three day music and camping festival. It was hot and there was a lot of walking and wandering to be done at such an event. The trick is to carry a minimal amount of accoutrements on ones person, besides the ever present water bottle I wore a wee festival purse, nice and light weight with only the essentials. My wallet had to be left behind as it suffers from a spot of the syndrome known as The Costanza Wallet. What with my ID, credit cards, debit cards, library cards, health cards for the entire family, grocery market member cards, local business support cards, various business cards, and etc., It takes up a heap of room and getting out my ID and importants is a struggle. However, I found having these things loose in my wee festival bag was precarious, and I wished I had something compact and useful for the few necessary cards I was carrying. Something like a handy free-style pocket, as I am rather fond of a handy pocket don't you know.
I have found that such an item is not just good for the carefree festival days, but indeed an all year round, every day sort of good. Since I am not one to scour the interwebs for just the perfect item, or spend hours looking for a how-to that isn't exactly right; I simply got to work with a couple of scraps and my sewing machine.
The result was so quick in the making and most excellent in the cute and useful department that I thought I just had to share it with all of my friends here! So, enough of my rambling ways, let us get on with the Tutorial (the nitty gritty details)!
Ingredients:
A scrap of oil cloth - measuring at least 12" x 7" (30.5cm x 18cm)
A scrap of clear vinyl fabric - measuring at least 7" x 5" (18cm x 13cm)
Ruler, thread and scissors
Note:
You can find oil cloth and clear vinyl fabric in many fabric stores and some craft stores, and of course there are many sources on-line.
Note of disclaiming: My inches to centimeters conversion is approximate and untested, just sayin'.
Instructions:

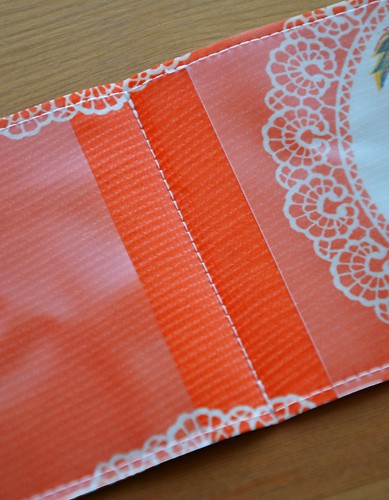
Cut 2 pieces of clear vinyl measuring 2.25" x 3.75" (5.75cm x 9.5cm)

Place the 2 vinyl pieces even with the inside outer short edges of the oil cloth as pictured. (It is up to you to choose what side you want to be the inside of your wallet)

This is the only tricky part as the materials are a bit slippy. If you are having particular trouble with slippage, use a bit of tape to hold the pieces together then remove them after stitching. I managed to contort my hands awkwardly enough to keep it together without tape, but it took some practice.
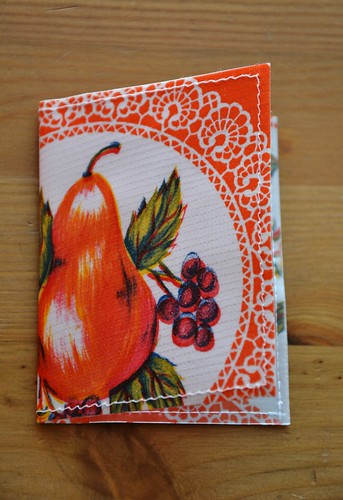
Next you need to... oh wait, you are done already! Holy smokes that was fast! Your Quick sticks card caddy is ready for action!
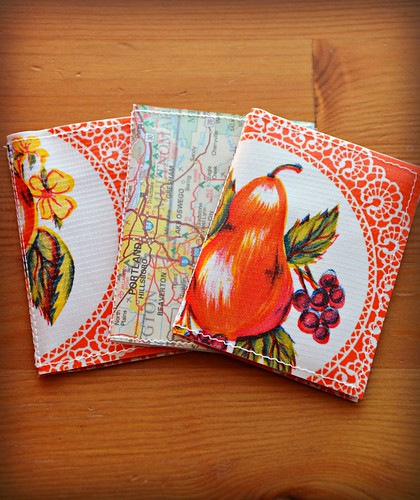
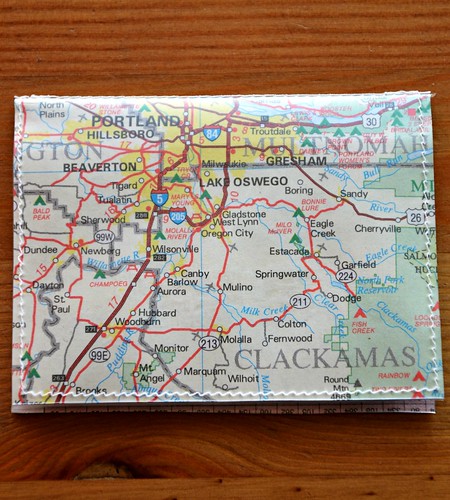
Once you make the first one and realize how easy and quick this project truly is, you'll want to make some more. I made 3 in no time! I even tried out making one from all clear vinyl, then slipped a cut piece of an old map in between the outside and the lining, tres hip no?
Uses:
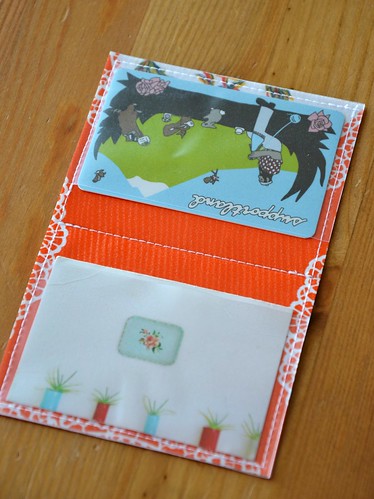
ID Holder
Card Caddy
Business Card Carrier
Gift Card Presenter
Slim Bi-fold
Stocking Stuffer
and on, and on...
You could make the wallet with out the clear vinyl, you just wont be able to see through to the cards. You could make it out of felt as well.
Well, I do hope you have enjoyed this quick stitch tutorial! If you have any questions, ask away. And as always, if you make one I would love to know about it; please upload a photo of your card caddy to my Flickr group HERE!
Happy Stitching!
13 comments:
A fabulous tutorial - thank you. I will certainly be trying it out. Liz xx
Love it! Quick and cool. :)
Me like! I may have to make one or ten at some point soon. Thanks
love it! & what a great gift idea~ thanks for sharing~
Perfect! Who doesn't need a card wallet every now and then?! This is gorgeous and easy (easy is always right up my alley) thanks for sharing..x
Love these!! Such a sweet idea, and easy to make! Thanks for sharing! xo Heather
cute cute wallet!
thanks for the tutorial.i too suffer-and my brother jokes about my costanza wallet ;)
i still have the (fabric)one that i won last year from your giveaway :) but will definitely be trying this one out too-i have quite a bit of oilcloth!
Very neat! I will try this, thank you :D
a nice simple project thank you! I know what you mean about carrying around a heavy purse, today I felt like I had a brick in my bag and when I looked it was my purse with everything in it!! Heather
Great tutorial, i've made wallets with fabric but what a good idea to use oilcloth, so practical. Thank you for sharing.
Carol xx
Really, really cute. I like your style. :)
Dearest Alexandra
Thank you so much for this very inspiring project, I had a few stolen moments of make my first card wallet this afternoon and have just posted about it. I love it, thanks so much xox Penelope
Binder clips work well to hold the pieces together and don't leave marks.
I'm confused about your measurements - if you have a piece of oilcloth 7.5" x 5.75", it will give you two pieces 3.75" x 5.75" and a piece of vinyl 7.5" x 2.25" will give you two pieces 3.75" x 2.25". I only saw those four pieces of material in the pattern.
This means that you could make this from much smaller scraps than the sizes listed.
I just measured two of my cards and they are 3 1/4" x 2 1/8".
Post a Comment