Showing posts with label natural dyes. Show all posts
Wednesday, November 4, 2015
Vintage Color
Ooh it's getting cold and rainy 'round these parts. This morning I couldn't quite shake a chill and toyed with the idea of starting a fire in the wood stove. I didn't, but I can see that the season's first fire is not long off. How's the season treating you where you are I wonder?
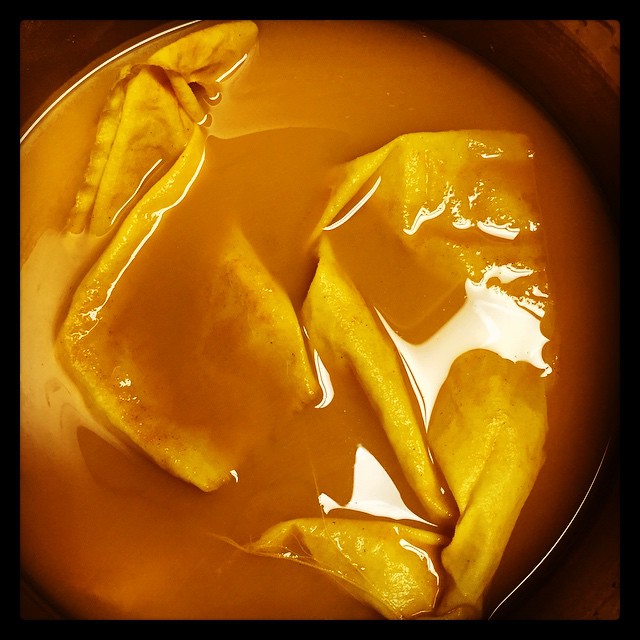
Yesterday I spent the morning visiting a friend in the hospital and got home just in time to put on a dye pot. It was an easy dye as I was using the water from soaking black beans, this dye pot does not need heat so it's a bit less intensive. However, I was dyeing The Cascade Dress from my last post and it was rather a lot more fabric than I have dyed at any one time. I learned that I am going to need one of those super duper giant enamel canning pots if I intend to dye whole dresses on the regular.
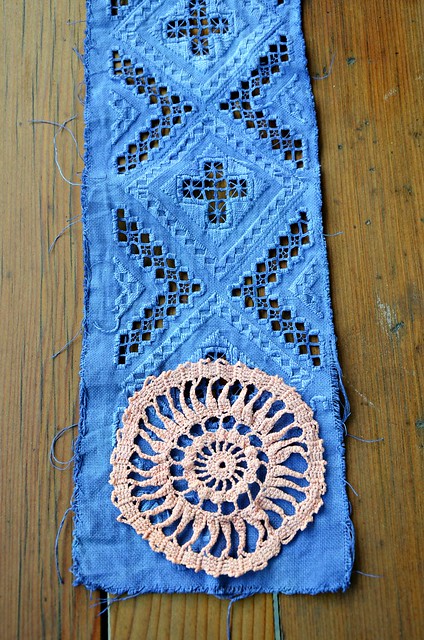
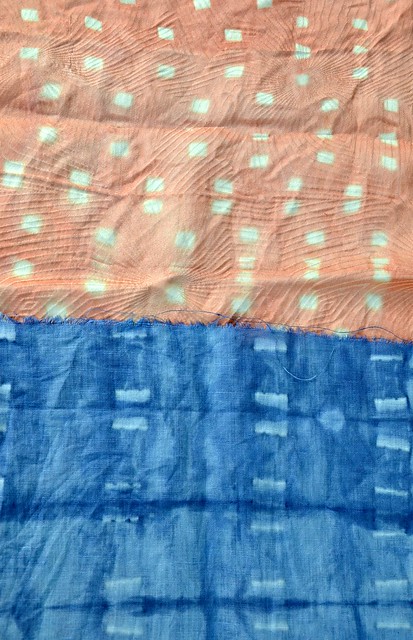
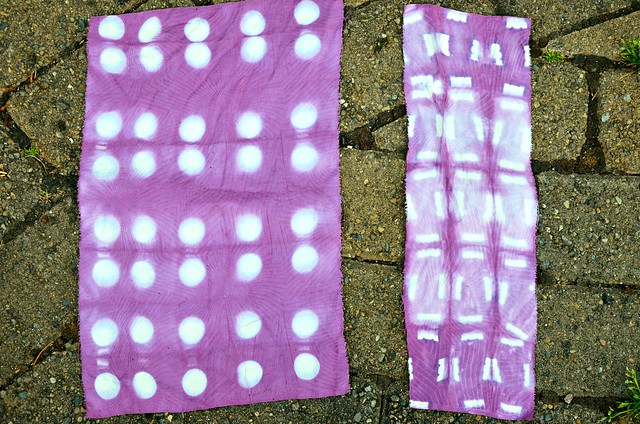
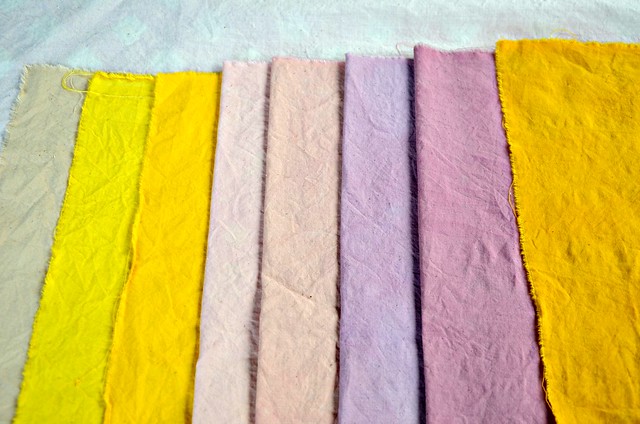
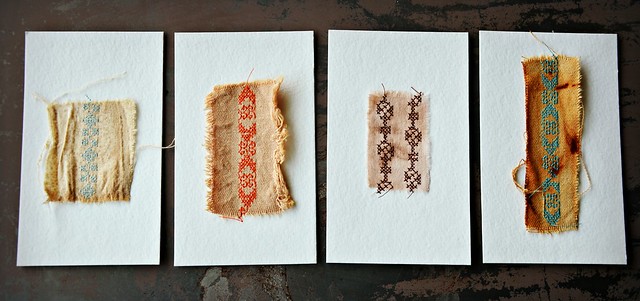
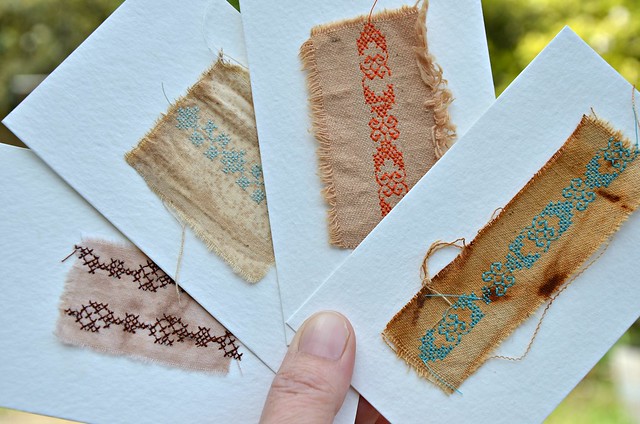
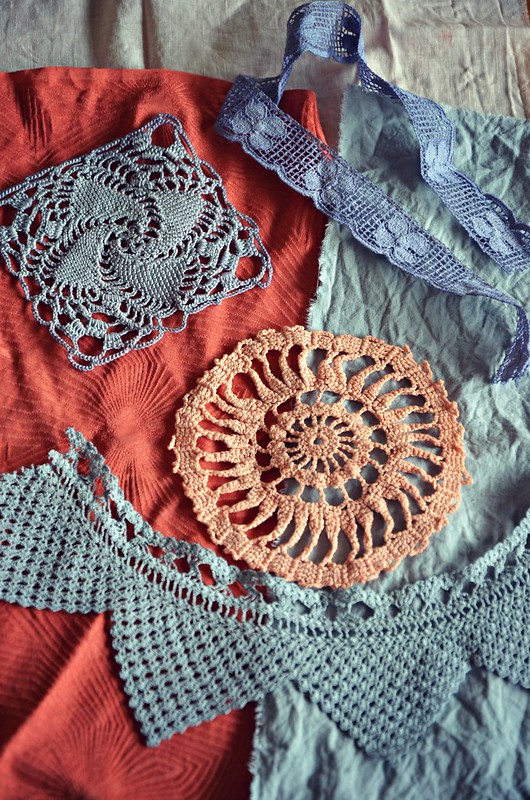
I also threw in a few vintage lace and doily bits. Before I sunk my dress into the murky depths of the black bean dye pot, I did a few experiments with modifiers. On it's own, black bean water can produce purple, purplish grays, blues, and the like. Adding an iron modifier creates a really lovely blue gray, more sombre in tone, or if left to soak for a longer time, it would produce a dark gray. Vinegar, depending on the length of soak, can produce a light fuchsia pink or a brighter purple. Using soda ash as a modifier will create a really pretty vintage cream color. I am sure the variations would continue using other modifiers such as copper, etc, but I'll have to experiment with that at another time.
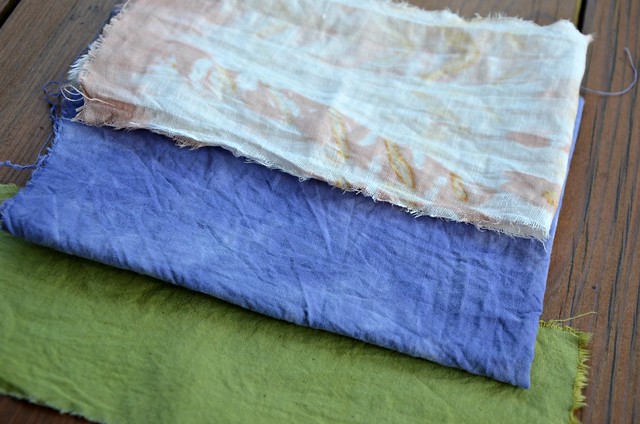
In the picture above you'll see some of the variations from the black bean dye pots and some from an earlier dye day using Madder. I love looking at the pieces, especially the vintage bits. I continue to be enthralled with the process of natural dyeing and all of the variations that can happen. It is an ancient process and as with many old ways, it takes time. It's slow color, always changing.
As the seasons change and fresh dyeing ingredients are less available, I'll learn to adapt and work with what is at hand. Not to mention that with the cold moving in, those steaming dye pots will be far more welcome than in the heat of Summer. I started my natural dyeing journey earlier this year, and I can see that there is such a very long way to go yet to learn all the things I desire to. I'm ok with that, in fact, I look forward to many years of learning and travelling along this journey.
Friday, October 9, 2015
Fall Color, Natural Dyes of the Pacific Northwest
As I mentioned in my last post, I attended a Natural Dyeing class on Sunday. It was held at the amazing Wild Craft Studio here in the Northwest.
First, let me say that the setting alone is worth the trip. What a beautiful area, and so different from the landscape here in Portland, though it's only a little over and hour away. Wild Craft Studio holds a large range of awesome classes, there are so many I would like to take!
It was a bluebird day. As we arrived, we were invited into the cozy studio to have tea or coffee while we waited for the rest of the class to come. The class on Sunday was taught by the very knowledgeable and lovely Chelsea Heffner. What a grand day it was! Chelsea went through all the basics, processes, plants and so much great information. While I was familiar with most of the information from my natural dyeing fever earlier this year, there was plenty of new things to wrap my head around, and I really appreciated the way Chelsea presented everything.
Coreopsis flower and Poke Berry
Poke Berry stains on my hands
We processed some plant material and started our dye baths. Then it was time for a forage out in nature. We learned to identify some native plants and picked rose hips for another dye bath.
I spy my good buddies Tif and Meg!
After our hike it was time for lunch. We ate outside with a beautiful view, and wow, what a gorgeous meal they prepared for us! We ate and chatted in the sunshine, all of us soaking in the new knowledge from the morning.
Then it was back to the dye pots! We had samples to dye, wool and silk. Then we were all given a silk scarf to dye and take home. I loved seeing all of the scarves and experimenting that the group did.
Our Fall Color samples: Coreopsis, Lichen, Pokeberry, St. John's Wort,
Black Walnut, Rosehips
If you live anywhere nearby, I highly recommend taking a class with these amazing people! I know I had a blast and my love of natural dyeing has been re-energized!
Monday, May 4, 2015
More Adventures in Natural Dyeing
Yes, I've been at it again, I just can't stop! The most amazing results and surprises have come about, a few disappointments as well, but that is all part of the learning process.
The biggest "Wow" moment came from dyeing with black turtle beans. Depending on the fabric I used, I got deep blues to bright purple. My neighbors must have though I was a bit crazy when I was exclaiming over the results. Oh let's just face it, the neighbors thought that already.
I also tried dyeing with some Madder root and played with folding and clipping techniques. This is really fun and creates the most interesting designs.
The Blueberries on vintage kimono silk was another surprise, I didn't think that the color would be so saturated and delicious looking!
An experiment in over-dyeing created the loveliest green.
I'm even dyeing embroidery floss and loving the results.
Now, if I could just stop dyeing everything I can get my hands on and actually make something from my experiments! All in good time.
Happy Monday everyone!
Monday, April 27, 2015
Natural Plant Dyes
from left to right: 1. Birch Bark. 2-3. Turmeric. 4-5. Beet Root. 6-7. Hibiscus Flowers. 8. Combo of 2-7.
Birch Bark
Welcome to my new addiction. Dyeing with plant and food dyes has taken over my mind and body, not to mention my kitchen. Last week I decided it was finally time to just jump in and do some dyeing as it's been on my to-do list for ages. Well, down the rabbit hole I fell!
Turmeric
This process is akin to mixing potions, conjuring spells and concocting surprises. Each batch of dye is unpredictable, at least for the first time for me. You never know exactly what you are going to get once you rinse the fabric after you pull it from the dye bath. It really is quite amazing!
Hibiscus Flowers
Nothing was a disappointment because it was all so interesting and exciting. With each experiment I gained more knowledge and appreciation for the art. Now I'm looking at plants and food in a whole new way. I have started a dye journal to keep track of my work; in it is a growing list of dye stuffs that I can't wait to try out. As I go for walks in my neighborhood, I'm searching out plants that I might be able to glean for my experiments.
Beet Root
For my first foray into the art of natural dyeing I kept it very simple. I used a lightweight unbleached cotton muslin for all of the dyes. I used what is considered the safest mordant (what helps fix the dye to the fiber/fabric) of Alum and Cream of Tartar in water. I simmered the fabric in the mordant for an hour.
For the dye baths I went with some research along with some intuition. Some were simmered in water for an hour, others simmered for less time. I did feel that I should have soaked the Birch Bark for a couple of days, but I was just a little impatient. Then I left the fabric in the dye baths for different amounts of time to see what would happen.
I am so looking forward to gaining more knowledge and dyeing more stuff. It really is such a joyous (if time consuming) process. I do suspect the household chores might suffer quite a bit. That's alright, it's all for art and science!
I want to thank Annie Cholewa for her encouragement and cheering me on to give this a go!
So, what have y'all been up to?
Friday, April 10, 2015
Dye and Stitch
Tobacco, Tea, Coffee Grounds, Rusty Nail
I was messing around with some of my dye sample pieces and there was some watercolor paper 3 x 5 cards I had cut up for whatever reason and then... well things just sort of happened.
My machine has many stitch options, but the truth is I only use a very small portion of the stitches on a regular basis. I thought I might dare to use some of the fancy cross stitch options. Taking one of my bits of dyed fabric I stitched it directly onto the paper card. I was so enamored of the result I did a tiny series of them.
On the back of the cards I wrote down the fabric, dye, and stitch information.
I may just be playing with these little pieces and tiny series for a while.
Happy weekend everyone!
Subscribe to:
Posts (Atom)