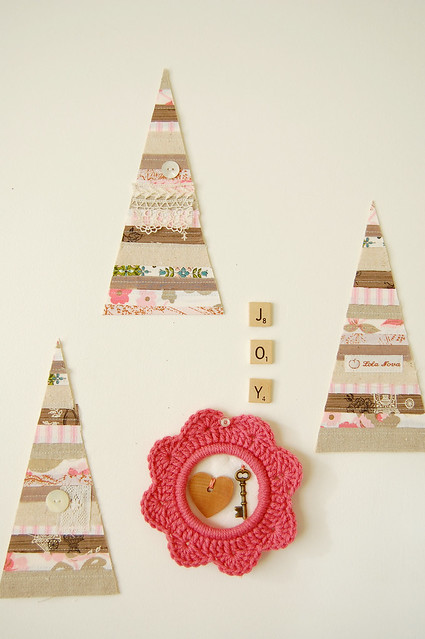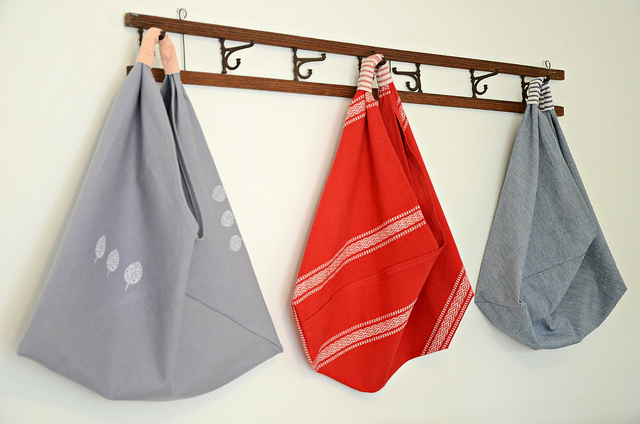
Showing posts with label Happy How To. Show all posts

Tuesday, June 25, 2013

Origami Market Bag Tutorial


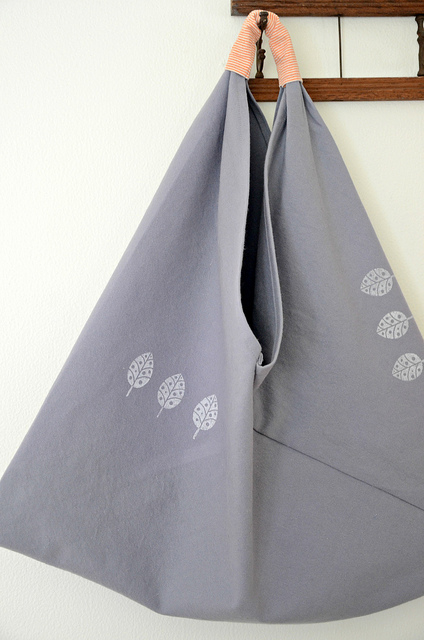
Here is the tutorial for my Origami Market Bag in case you missed it the first time over on WhipUp.

I decided to whip up a simple tutorial for a handmade market bag called “The Origami Market Bag”. The name is taken from its unique folding technique. It makes up in a flash and is nice and roomy for all of your market treasure.

My version of this bag was originally based on a bag I received many, many years ago that was handmade by a family friend from the Philippines. That first bag was made from old cotton rice sacks (similar to vintage flour sacks) and the handles tied in a knot. Not long after receiving it, I made my own bag using a couple of bandannas sewn together. In the years since, I have seen many versions of this very simple bag. Many variations of it have shown up as craft trends come and go, then come around again. I have seen similar patterns in vintage craft books, Japanese craft pattern books and high end leather bags on the runway. I have even seen some in macramé! This is my updated version of that original bag that I received years ago.

You will need fabric, thread, scissors and a sewing machine.

For the fabric, I suggest something a little heavier such as: canvas, linen, denim, or home décor type weight.
We start off with a piece of fabric whose length is 3 times the width. I found using a piece that is 17” X 51” (43cm X 130cm) makes a good size bag; you can play around with sizes if you like.

Once you have cut your piece of fabric to size, hem all of the raw edges.

(In the following photos I’ve used a smaller piece of unfinished fabric just to show the folding technique)
Start by laying your fabric with your hems facing away from you and follow the folding technique as shown below.

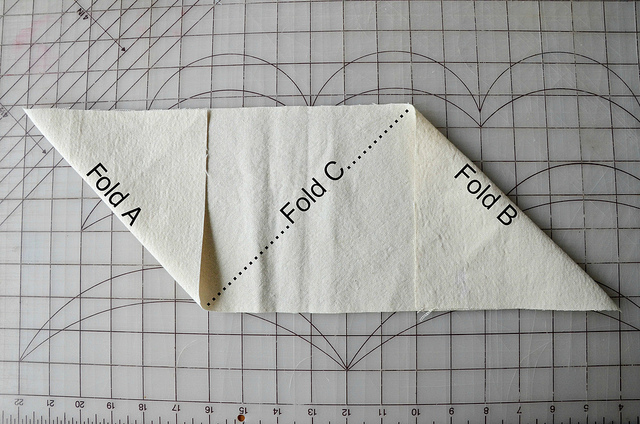
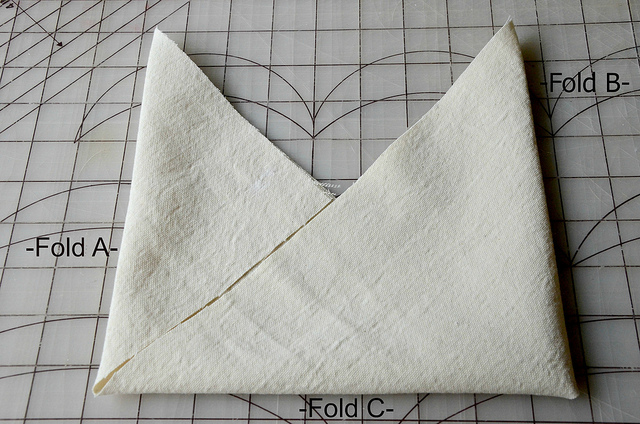


Now pin and stitch as shown for both sides of the bag. I used about a 1cm seam allowance.
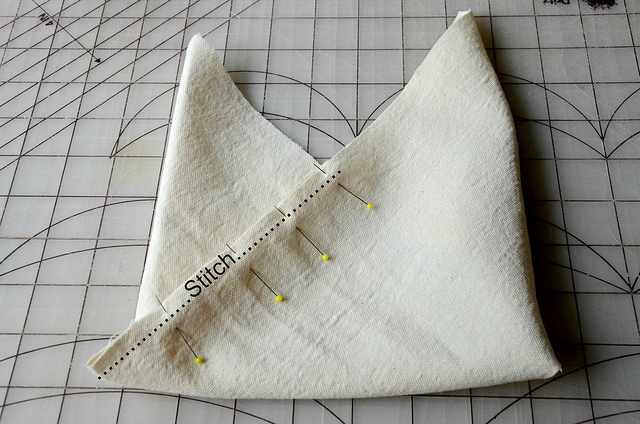

It is ok if your bag is a little off center, this may happen if your hems are not perfectly even to one another.
Now that you have sewn your 2 seams, you can leave the bag as is for a nice triangle shape, or you can create some shape by sewing boxed corners, or simple angled corners. Now turn your bag right side out and press if needed.


The next step is to create the handle for your bag. I used some coordinating fabric for a handle.
Cut a piece of fabric that is 3.5” X 6.5” (aprox. 9cm X 16.5cm) turn under and hem the 2 short sides of this piece. Fold the piece in half length-wise with right sides together and stitch raw edges with a ¼” (just under 1cm) seam allowance and turn right side out creating a tube.


Take one of the long top triangles of your bag and thread it through the tube of fabric as shown. Overlap the other top piece with the bit you have threaded through the tube and pin. Now stitch in place. Slide the tube over the stitched overlapped section and center it.


Ta Da! You now have your very own Origami Market Bag!


Go ahead and make a few more, you know you want to!


Please note, this tutorial is intended for personal use only. Therefore, do not reproduce, sell or commercialize in any form. Thanks for understanding!

Wednesday, February 13, 2013

Stripey Hearts


I have been tres busy working on a little secret project that I hope to reveal at the end of this week. That means that I haven't been working on any 'day of hearts' business, oh dear me!

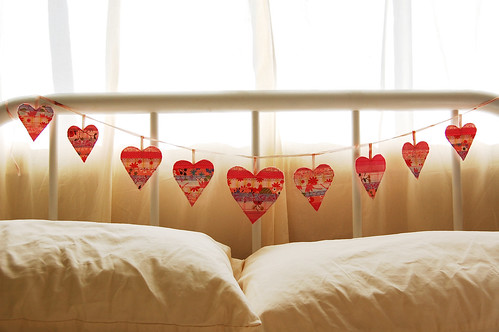
So I took a look back in time to a project that makes a fine last minute Valentine, or anytime project really, and that my friends would be a garland of stripey hearts!

Simply follow my tutorial on making Happy Stripey Ornaments HERE, only instead of sewing your strips of fabric to a sheet of paper, sew them onto a square/sheet of felt. Then out of that you would cut out heart shapes, as many as you please. Finish by sewing around the outer edge of the heart and attaching a loop of ribbon or yarn to the top of the heart in the process. Then string your hearts into a pretty garland of love! Easy peasy no?

And oh so pretty!


Thursday, May 10, 2012

Happy Birthday Mollie!

On news stands tomorrow the 11th (at least in the UK) is Mollie Makes Birthday Issue! Wow, time flies! As a special treat they are bundling issue #14 with a free "Let's Get Hitched!" wedding magazine. How cool is that?

I feel especially honored to have been featured in the very first issue of Mollie Makes last year.

Which is available as a FREE digital download for Apple users until June 8th!

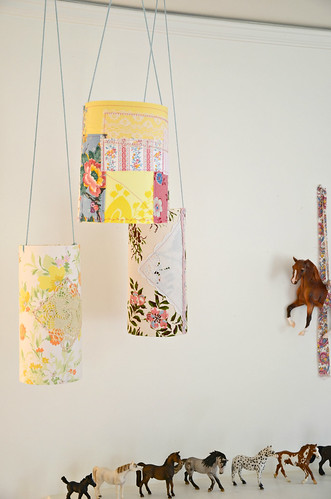
I am also excited to have my Pretty Patchy Paper Lanterns shown off in this birthday issue! If you want to know how to make your own, just click the link above to take you to the tutorial!


So happy, happy birthday Mollie Makes! I hope there is lots of cake!

Thanks for all the love!


Friday, September 16, 2011

Pretty Patchy Paper Lanterns

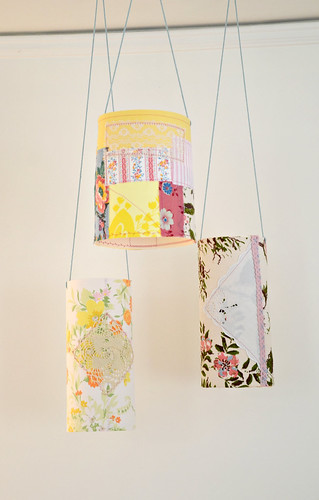
Oh hooray, it's a happy how-to! Today I will be showing you how to make some very simple Pretty Patchy Paper Lanterns, my that is a mouthful isn't it? These are just the thing to brighten up a drab corner, to add a festive air to a dull day, to use as decoration for a party, or to make just because they are so darn sweet! As is often the case with my tutorials, this is a project that works wonderfully using up your odds and ends, bits and bobs, and scraps of many sizes.

I shall begin with an ingredient list:

* Aforementioned odds and ends of pretty fabrics. For my examples I have used mostly vintage cut offs from my scrap pile.

* Bits and bobs of lace, ribbon, trim, old hankies, what-nots and etcetera

* 2 pieces of standard A4 card stock

* Embroidery Floss and large embroidery needle

* Lengths of yarn

* Scissors, thread, glue, tape

Alright then, the first lantern I'll be showing you is the plump roundy one with all the patches. Let's get started then shall we?

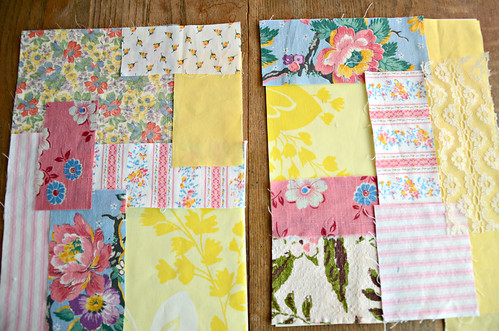
Start by gathering up a bunch of scraps that you think might play nicely together. Grab your 2 pieces of card stock and begin arranging your scraps on the papers. You might like to do this over a cup of tea or coffee. Just keep at it until the space is filled and you are pleased with the results.

Now you may want to use just a spot of glue to keep everything in place. If you do use glue, please only use a small amount and wait for it to dry because we are about to take this over to the sewing machine and we don't want any goopy glue to muck up the works, that would be a bummer!

Take your fabric festooned card stock over to your trusty sewing machine and just begin stitching your fabric to the paper. Use a straight stitch around the edges of your scraps, or use a fancy stitch across one part and another across a different part...do what you like just as long as all of the fabric is secured to the card stock.

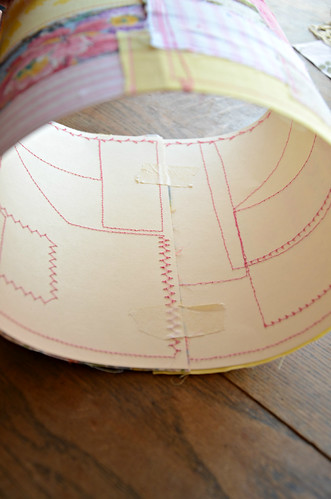
Ok, that was fun. Now take your 2 pieces and put them end to end with about a 1/2 inch of overlap and it's back to the sewing machine to stitch the 2 pieces together to make one long piece.

Next, we turn our patchy card stock into a tube, overlap the ends by a half inch and tape in place on the inside.

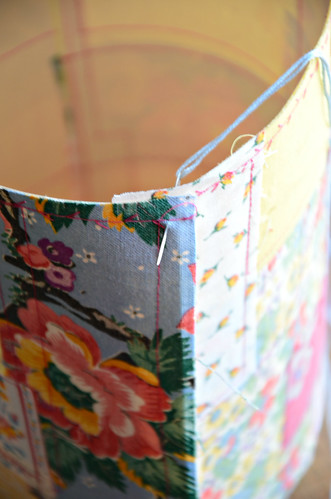
When you stand it up, it's gonna look a little wonky, but don't worry we're gonna fix it. Get out your embroidery floss and your big needle, starting from the inside of the tube, poke your threaded needle through both layers of the paper and fabric and begin stitching that flap down.

Ack! excuse the blurry photo wont you!
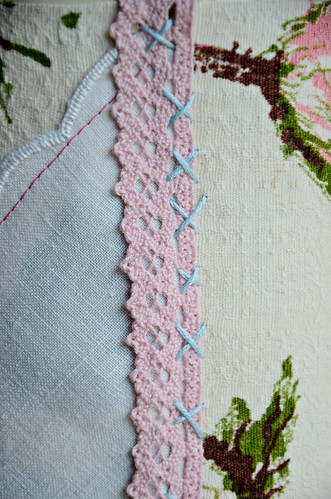
You can simply stitch all the way down using a giant running stitch, cross hatches, etc...whatever you have the patience for really. I myself did not have a great deal of patience, so it came out a little crazy. For example...

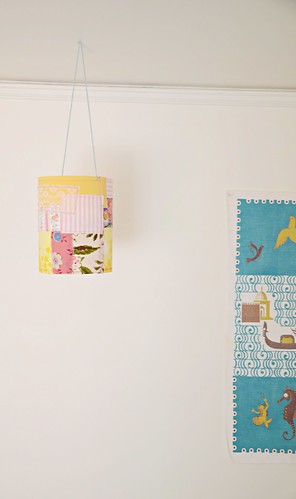
All that is left now is to add something so you can hang it up. I used some yarn, whatever length suits your particular needs. Poke a hole about a half an inch from the top of the lantern at any spot you choose. Now poke another hole directly across from the first hole and thread your yarn through the holes and tie off. Like so...

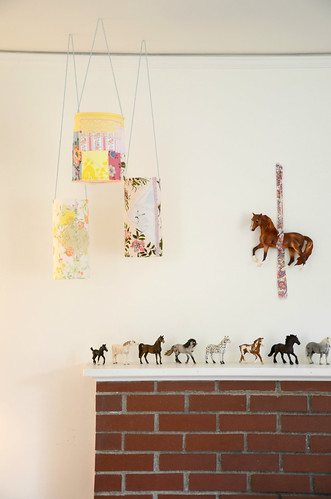
Find a spot that needs a little happy and hang up your lantern!

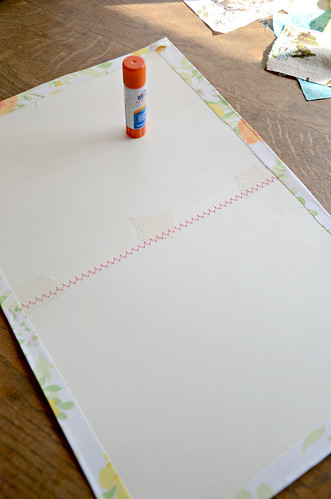
For the other lanterns, you start by placing your 2 pieces of card stock side by side with a half inch overlap and sew them together.

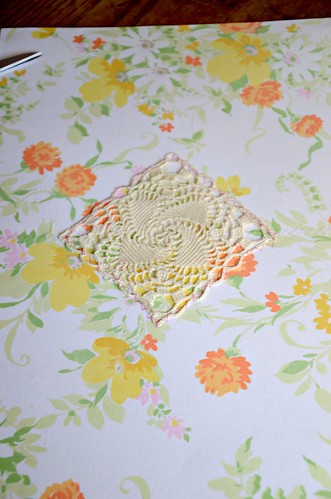
For this example I chose a piece of fabric and cut it just slightly larger than the paper. I then used some spray adhesive (you could use regular glue as well) and smoothed the fabric over the card stock.

I then used a glue stick to fold over the edges of the fabric and stick them to the back.

I added a wee doily to the lantern and stitched it in place.

Your lantern is now ready to be finished in the same way as the first example!
Go ahead, make a few...you know you want to!


As always, if you are inspired to try your hand at these Pretty Patchy Paper Lanterns, I would be most pleased if you would share your creations on the Lola Nova Flickr group!

Edited to add: These lanterns are meant to be decorative and not for use with lights or bulbs.

Have a truly wonderful weekend my friends!

Tuesday, December 7, 2010

A Happy 'How To'

Last week whilst I was sweeping up the little green cottage, a light bulb popped on over my untamed curls. It was the shiny light of an exciting crafty idea, the kind that keeps one up all hours mulling it over.

You see, in my making, I end up with scraps of fabric in all shapes and sizes. There is a sort of loose organization going on with my save piles. I do hold on to cherished bits and vintage darlings. I keep especially, the long straight-ish strips of favorite fabrics, selvedge ends, cuts from quilting, anything stripy. Recently I had taken note that my basket of strips was bursting and threatening to make a run for it if I didn't make use of them quickly.

And so...long story short, I started having a bit of a crafty revolution, making up all sorts of goodness with my runaway strips. In this 'how to' I will show you how to make those stripy trees in the top picture. However, the technique I'm going to show you is limitless in it's possible applications. It is so easy peasy and slightly addictive ...or maybe it's just me.

Here's what you'll need:
A collection of fabric strips in varying widths (none of mine were over an inch wide).
Some cardstock paper
Scissors
Thread
Glue stick (optional)
Sewing Machine
some buttons and bits of lace or ribbon

Now, choose a bunch of strips that you like and start laying them out together in an order that is pleasing to you. Grab your cardstock (in this example, I am using an A4 piece that has been cut in half lengthwise). I make sure that I have the right amount of fabric strips to cover the entire piece of cardstock.

Pick up your first fabric strip, I work from the bottom up. Place your fabric strip so that it is even with the bottom edge of your piece of paper.

If you like, you can use a small bit of glue to hold it in place. If you are using glue you will want to wait a few minutes to let it dry before going to your sewing machine and use the smallest amount so that it doesn't goop up your machine.

Now, take your paper and fabric to the sewing machine and simply straight stitch down the middle of your fabric strip, attaching it to the cardstock.

Choose your next strip of fabric and place it next to your first strip, slightly overlapping the sewn strip.

Stitch this strip in the same way as the first.

Continue repeating the process with all of your strips, remembering to overlap each one slightly. Or, you could lightly glue all your strips into place first, allow the glue to dry and then stitch them to the paper.

Once you have finished, turn the paper over and draw equal triangles onto the cardstock. I used a ruler and a pencil to make my markings. I was able to get 6 equal triangles out of this piece, with 2 half triangles left over.

Cut along your lines and voila! you have 6 lovely stripy tree triangles.

Aren't they nice? Oh, they could use a little something though. Time to break out the buttons and lace.

Sew on some buttons, a label, some lace or ribbon, whatever strikes your fancy!

At this point, you could turn them into some pretty groovy tree ornaments by either sewing or gluing two of the triangles back to back. With a good size needle, sew some embroidery floss or yarn through the top to be able to hang it.

I decided to turn these into a happy little garland.

Depending on what fabrics you use, this technique can look quilty or pleated, it's pretty fun to see what you can come up with. You could make this a 'no sew' kid friendly project too just by using a bit more glue. There is no limit to what you can make with this process.

I think it would make a pretty great stitched postcard!

I turned some of the small left over bits into gift tags by sewing another piece of cardstock to the back.

I even turned some into little birds on a string of ric-rac, tweet!

I hope you have enjoyed this simple 'Happy How To'! If you make some trees or use this technique to make other clever stuff, I would love it if you added photos to my flickr group!

Have a happy happy day!