Showing posts with label design. Show all posts

Wednesday, March 11, 2015

Edelweiss


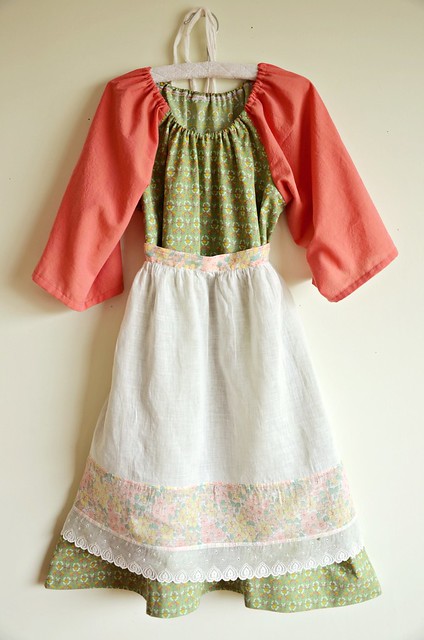
I've come down with a bit of cold, so yesterday in my disoriented state I decided Pony Girl needed a 70's style Boho dress, so I made one, as you do. I just grabbed an old curtain panel and a bit of leftover shot cotton and whipped it up quick sticks. 

I've also decided that she should wear it with a vintage apron à la The Sound of Music. We'll see if she agrees to this.


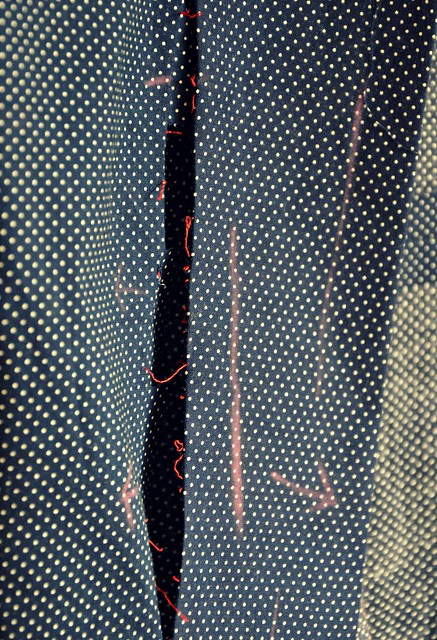
And this wrinkled mess is a design in progress; the bodice for a dress. While I liked my original design, as you can see from my slap dash markings that many changes are coming.


Oh now this is getting tricky. I might wait until my head is clear again before tackling this further!

What are you up to?


Tuesday, June 25, 2013

Origami Market Bag Tutorial


Here is the tutorial for my Origami Market Bag in case you missed it the first time over on WhipUp.

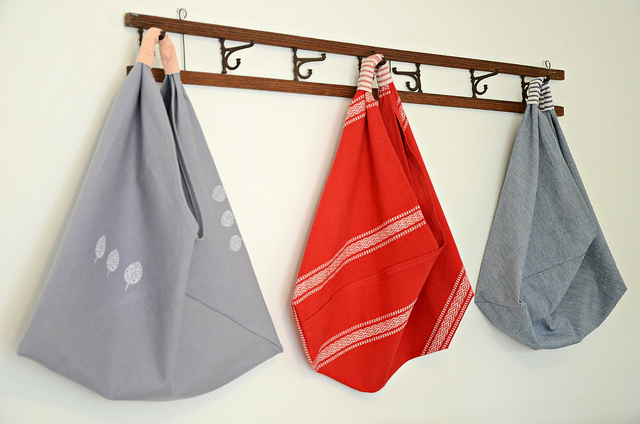
I decided to whip up a simple tutorial for a handmade market bag called “The Origami Market Bag”. The name is taken from its unique folding technique. It makes up in a flash and is nice and roomy for all of your market treasure.

My version of this bag was originally based on a bag I received many, many years ago that was handmade by a family friend from the Philippines. That first bag was made from old cotton rice sacks (similar to vintage flour sacks) and the handles tied in a knot. Not long after receiving it, I made my own bag using a couple of bandannas sewn together. In the years since, I have seen many versions of this very simple bag. Many variations of it have shown up as craft trends come and go, then come around again. I have seen similar patterns in vintage craft books, Japanese craft pattern books and high end leather bags on the runway. I have even seen some in macramé! This is my updated version of that original bag that I received years ago.

You will need fabric, thread, scissors and a sewing machine.

For the fabric, I suggest something a little heavier such as: canvas, linen, denim, or home décor type weight.
We start off with a piece of fabric whose length is 3 times the width. I found using a piece that is 17” X 51” (43cm X 130cm) makes a good size bag; you can play around with sizes if you like.

Once you have cut your piece of fabric to size, hem all of the raw edges.

(In the following photos I’ve used a smaller piece of unfinished fabric just to show the folding technique)
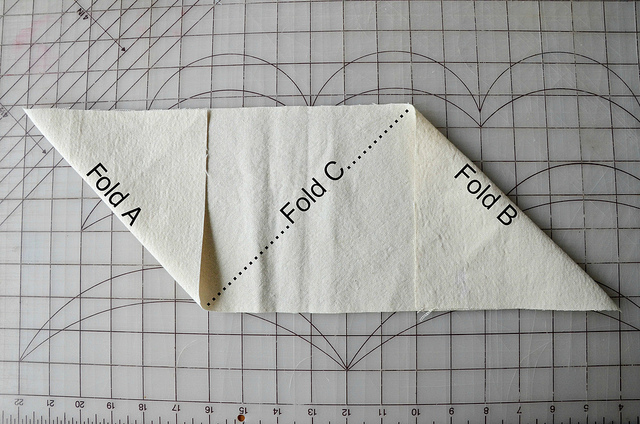
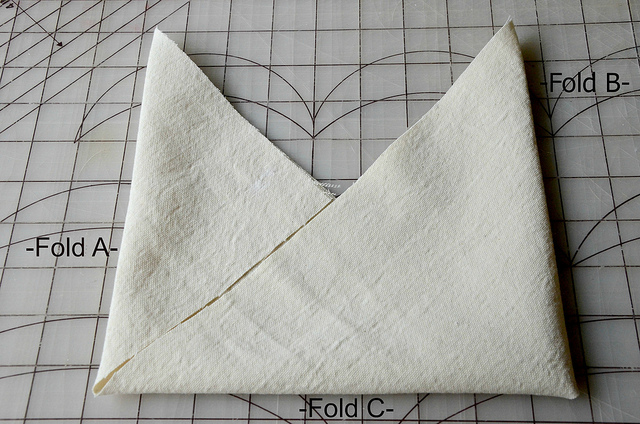
Start by laying your fabric with your hems facing away from you and follow the folding technique as shown below.


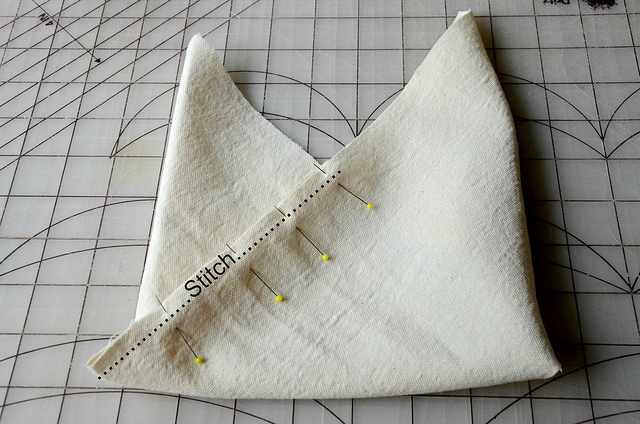
Now pin and stitch as shown for both sides of the bag. I used about a 1cm seam allowance.


It is ok if your bag is a little off center, this may happen if your hems are not perfectly even to one another.
Now that you have sewn your 2 seams, you can leave the bag as is for a nice triangle shape, or you can create some shape by sewing boxed corners, or simple angled corners. Now turn your bag right side out and press if needed.


The next step is to create the handle for your bag. I used some coordinating fabric for a handle.
Cut a piece of fabric that is 3.5” X 6.5” (aprox. 9cm X 16.5cm) turn under and hem the 2 short sides of this piece. Fold the piece in half length-wise with right sides together and stitch raw edges with a ¼” (just under 1cm) seam allowance and turn right side out creating a tube.


Take one of the long top triangles of your bag and thread it through the tube of fabric as shown. Overlap the other top piece with the bit you have threaded through the tube and pin. Now stitch in place. Slide the tube over the stitched overlapped section and center it.


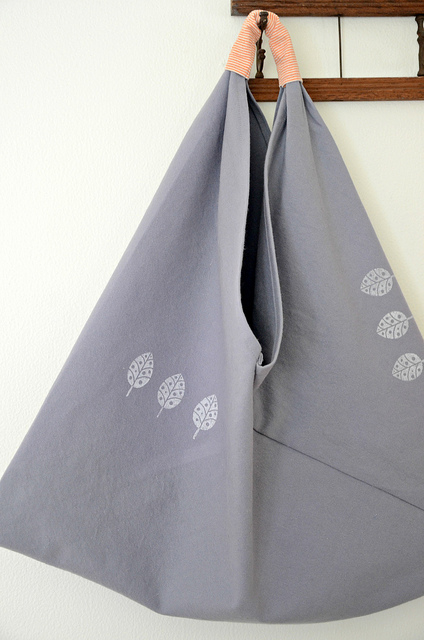
Ta Da! You now have your very own Origami Market Bag!


Go ahead and make a few more, you know you want to!


Please note, this tutorial is intended for personal use only. Therefore, do not reproduce, sell or commercialize in any form. Thanks for understanding!

Friday, June 29, 2012

Cheap, Fast and Easy: DIY Kid's Room Makeover

It was time, 7 years of purple walls (make that 'Smokey Lilac'); from babyhood, through toddler mayhem, straight on to little kid...there's bound to be a bit of grubby on them walls. It was time for a makeover. The criteria was strict; it had to be cheap, fast, and easy. It also had to be transitional, 'cause we may not be long for the little green cottage, it looks like we just might be moving on - more on that later. So there's that, and of course I had to consult Pony Girl.
She has told me that I may continue to call her Pony Girl "It's fine, whatever." But only until "The Muse strikes and something better comes along." Yeah, she said that.

She's going through a 'Red Period'. After I vetoed the red walls, I asked her for suggestions, "What do you want in your room?"
She said, "Butterflies, Surfer Girl, Animals, and Music."


The Mission:
Kid Room Makeover

Time Frame:
One Week. If you had the luxury of long uninterrupted days, you might be able to do it in 4.

Budget:
After painting expenses I allowed myself a budget of $50. If I had more time I would have lowered the budget by making more items.

The Vision:
Butterflies, Surfer Girl, Animals, and Music...and red.

O.k. I can do that; bring all those favorite things to life in one room - easy peasy. The key is color. I began by painting the walls a fresh light cream color.

Then we have the Neutrals: wood floors, wood furniture, cream and white, and a little gray. Then we bring in the main accent color RED. Then I added one more little pop of color with Turquoise.

Let's start with butterflies shall we?

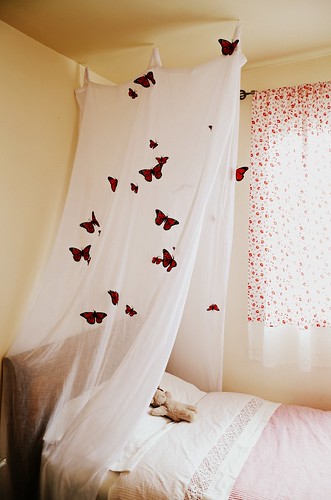
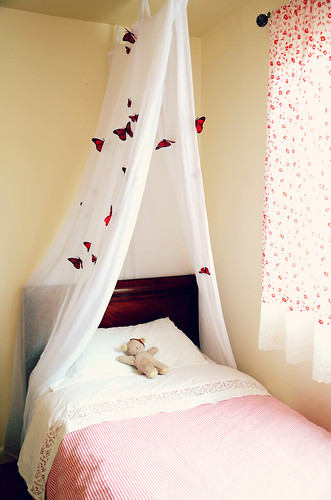
I made a sort of draping butterfly net over the bed by using 2 sheer tab top curtain panels that I had in my sewing space. I screwed a few hooks in the ceiling over the head of the bed and simply hooked the tabs onto to them. Then I found some red butterflies at my local craft store. The butterflies had long wires attached to them which I simply clipped short and stuck them into the curtain panels. Done!

If you don't have sheer curtains laying about, you could use fabric or even an old sheet cut in half length-wise, then sew some loops of ribbon to the tops. Not into butterflies? You could easily cut your preferred shapes out of felt or fabric and baste them on. Sea creatures, planets, birds, leaves, etc. would be pretty cool too!

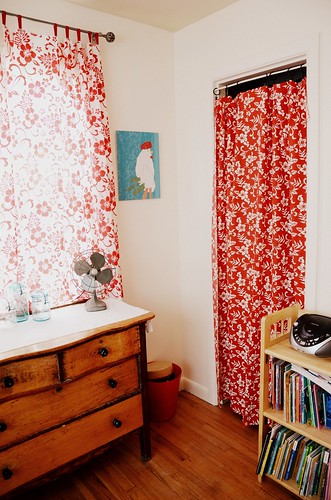
Now for 'Surfer Girl'. This was easily accomplished with a couple lengths of red and white Hawaiian fabric that I bought on the islands and have been hoarding in my stash. Now we have curtains!

For the window curtain I cut the length of fabric in half, quickly hemmed the cut ends and sewed loops to the two tops using bias tape/binding, you could use ribbon or twill tape as well. For the closet curtain I hemmed the cut ends of the fabric and used a spring loaded curtain rod with curtain clips. Done!

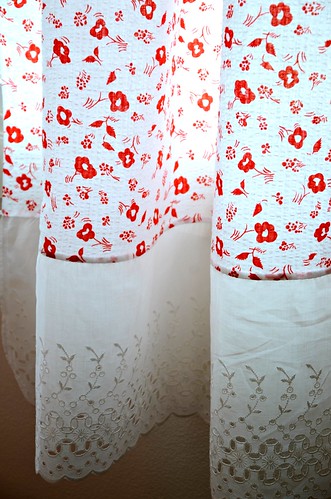
For the other window curtain it was pretty much the same process. I had some sweet white and red vintage seersucker fabric, but there wasn't quite enough to achieve the right length of curtains. So, I sewed some vintage white cotton eyelet to the bottoms of the curtain panels and Done!

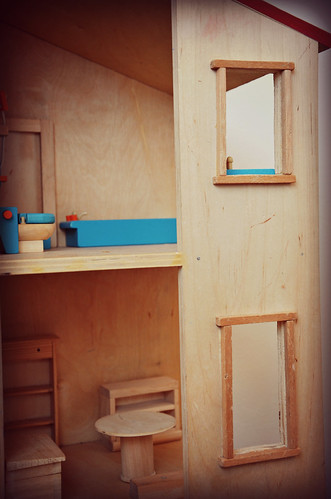
The inspiration for the Turquoise came from Pony Girl's dollhouse furniture. Plus, red and turquoise look great together.

Dollhouse handcrafted by the Engineer

Where were we? Oh yes, Animals!

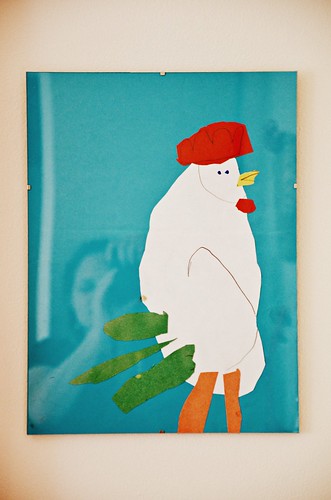
I can not tell you how much I love this chicken! Collage is one of my favorite projects to do with kids, I love the endless art that can be created. Just grab some colored paper and have at it! This picture already had the perfect color scheme and it's gorgeous; I just popped it into an old inexpensive frame I had around the house, instant art!

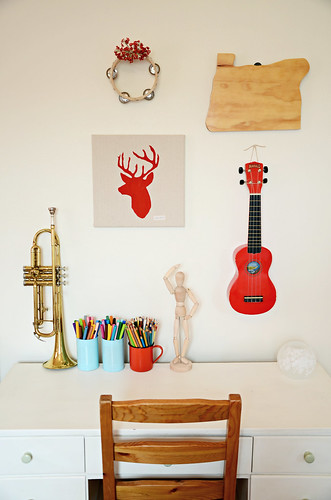
Animals and music over at the desk. The desk was originally found for free on the side of the road, given a fresh coat of paint and has plenty of drawers for storage of art supplies and such.

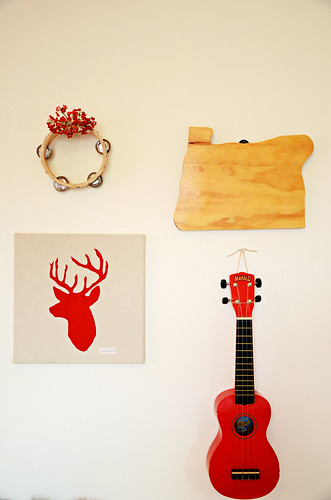
I spy 2 easy DIY projects. The wooden cut out of the state of Oregon was made by a family member. Simply trace your state, province, continent, onto a piece of wood, cut out with a jig saw, a little sanding and varnish and you got cool art!

I made the deer head by stenciling fabric paint onto a square of fabric scrap and stretched it over a cheap artist canvas and used a staple gun to secure it in place.

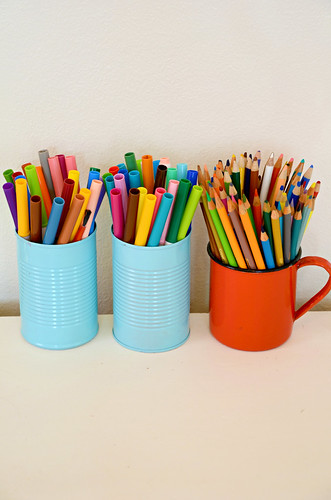
And of course I never tire of finding uses for spray painted food tins.

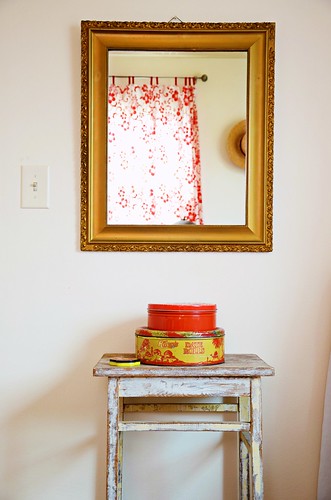
Next to the bed I placed an old end table with my grandmother's mirror. I used some vintage tins on the table to hold her rock and found treasure collections. Below the table is an old school locker basket to hold all of the current library books in one place (I realize that this may be a dream in the straw, but I'm hoping there will be less mad scrambling to find our library books come the due dates.)


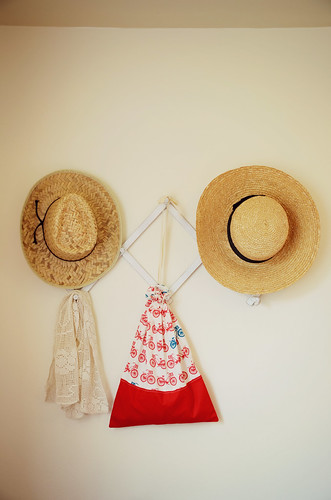
My Turquoise weekend bag was sacrificed to Barbie storage. An old collapsible peg rack found at the local thrift for $1.50 was ugly, but nothing a little paint couldn't fix.


Galvanized tubs at the foot of the bed make for great toy storage. You could hunt down some great baskets from a thrift store too.

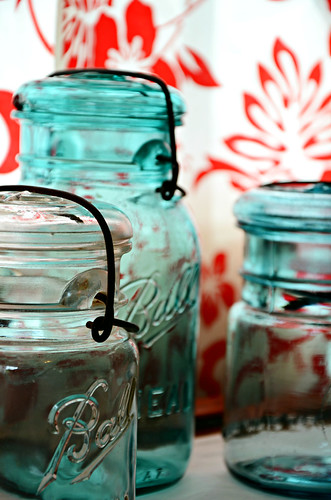
And a little extra pop of color on the dresser with my grandmother's blue canning jars will become storage for my girl's bead collection.


So, what I bought for the makeover:

Butterflies from the craft store $7.00
Galvanized Storage Tubs from the big home hardware store $15.00
Hat Rack from the local thrift $1.50
I splurged on a new muted red and white stripe Duvet cover from Ikea since I didn't have time to make my own $15.00

Grand Total: $38.50

Not too shabby!

I hope that maybe some of these Cheap, Fast, and Easy DIY ideas have inspired you!

Do you have any Cheap, Fast, and Easy DIY projects that you love?


Wednesday, June 22, 2011

Feltycuffs: A Tutorial

Due to my recent aquatic adventures, my 'makers mojo' and I have not been getting on too well. Something about me being unbalanced (go ahead, make your jokes now) and the concentration and constant looking down of stitching, made me a bit queasy, dizzy and blurry. Now that I am finally coming 'round a bit, I felt the need to make something - anything. I thought that I should start off small and simple. Then fortuitously, I received an email from a friend asking me to recommend some sewing projects that might be suitable for 10 year old girls. I sent her some links and then later, she asked if I had any ideas that could be accomplished by 3 girls during a crafty sleepover with beginning sewing machine skills. I thought about it for a while, and finally resorted to Feltycuffs. Do you see what I did there? Instead of 'Fistycuffs' I said...yes, well.

Felt is awesome, it's a no fuss, no muss material that makes up some seriously cool projects. It also ticks all the right boxes for a kid craft. However, once I started playing around with the felt, I started to imagine all the cool grown up stuff I could make using the same ideas.

The first thing I came up with was a woven felt wrist cuff/bracelet. I will be showing you in a brief, step by step tutorial how to make your own. So, here we go!

Gather up some felt scraps.
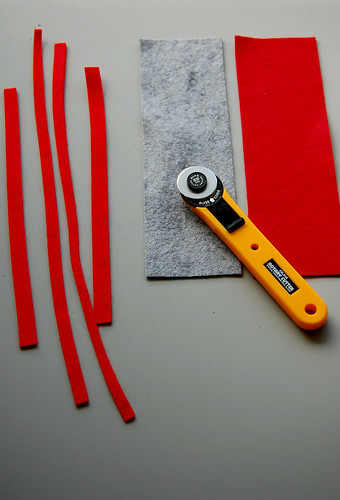
You will need 2 pieces for the main cuff part. You can measure your wrist with a tape measure, making sure it is not too tight but, a comfortable length on your wrist. Once you have that measurement, add 2 - 2.5 inches (5.5 - 6.4 cm) for overlap. I cut my pieces 8.25 inches (21 cm) long by 2.5 inches (6.4 cm) wide. Then cut some skinny strips of felt slightly longer than your main pieces. I cut 4 strips.
Using a rotary cutter and mat make this quick work, you can also use scissors.

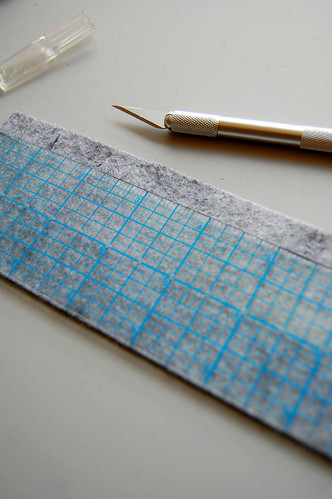
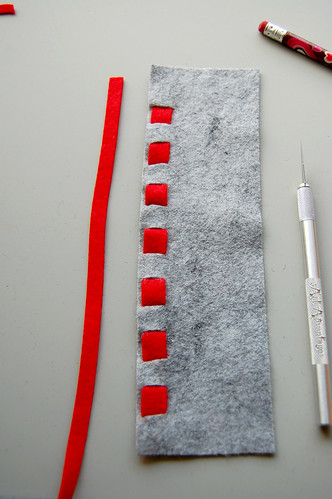
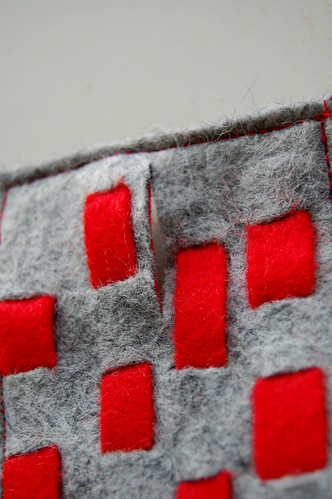
Now, working with the top piece of your main cuff (I used gray), use a craft knife* or small embroidery scissors, and a ruler to make 4 rows of small slits in the felt. To make this more even, you can place markings on the wrong side of the felt with a fabric marker. Make your slits just big enough for your skinny strips to fit through. I made my cuts every 1/2 inch (1.3 cm) along the length and in 4 rows across the width. I did not mark mine so they came out a bit wonky.

* If you are doing this project with kids, you will want to supervise use of the sharp craft knife.

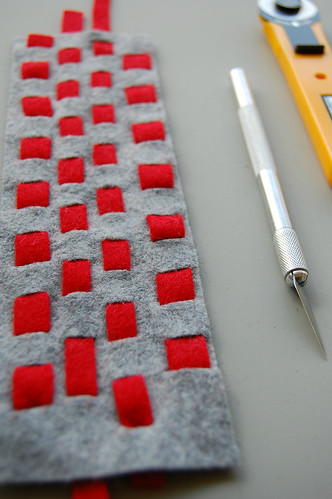
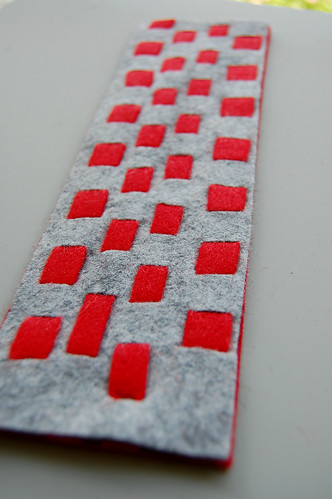
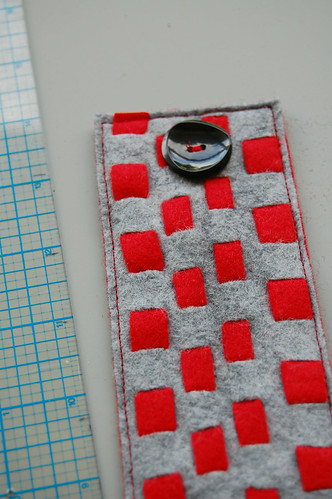
Now start weaving in your skinny strips. It's up to you if you want to alternate the pattern. Try to be fairly gentle, as you don't want to stretch out the felt too much.

Once you have woven in all the strips, trim off any excess length.

I gave my finished piece a quick press with the iron before I continued.
Next, Match the edges of your 2 cuff pieces, wrong sides together.

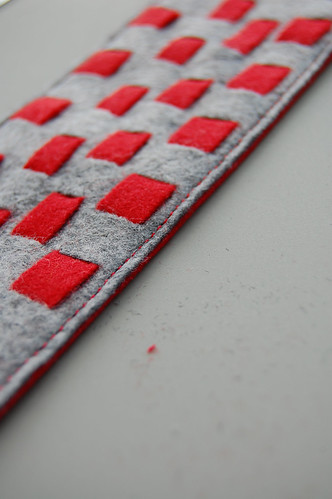
Using a simple straight stitch on your machine, sew around the outer edge, using 1/8 inch (0.3 cm) seam allowance.

In one end of your cuff, make a slit with a craft knife or scissors just big enough for your chosen button.

On the opposite end, sew on your button. Wrap the cuff around your wrist to help find the proper placement of the button.

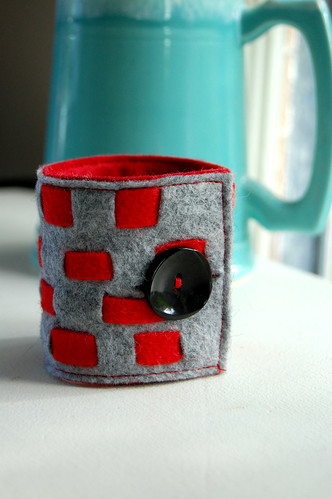
Ta Da! A super cool, super easy woven felt wrist cuff!

After I made this one, I couldn't stop. So, I made 2 Super Star cuffs for Pony Girl. I used the exact same technique for the cuffs but, without the woven element. I simply cut out 2 simple star shapes out of contrasting felt and appliqued them to the cuffs with a straight stitch.

Here is Pony Girl rockin' her cuffs!

(click the pic for 10 times the awesome!)
And I still couldn't stop!

What about a simple and elegant napkin ring? Does anyone use those anymore? I used to love looking at my mother's small collection of vintage napkin rings when I was a kid. I thought it would look so nice for a special dinner.
Wait, there's more!

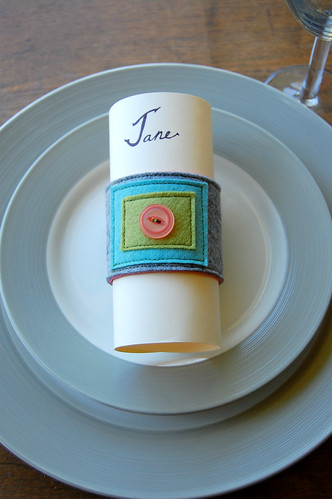
What about place holders? These would be so pretty at a wedding, special party, or just because.


So yes, endless possibilities! I made one wrist cuff with a crochet flower sewn on that turned out lovely. It was too dark to photograph by that point. I keep thinking of other ways to use this very simple idea. How about you, can you think of some?

As always with my tutorials, please feel free to ask questions. And, if you make this project, or one inspired by this project, I would love it if you uploaded a photo to the "Lola By You" flickr group!

Have a super star day!

Oh, I almost forgot. Lola has a new Facebook page come check it out!