Showing posts with label in the kitchen with Lola. Show all posts

Monday, October 19, 2015

Pumpkin Spice Bread


Tis the season. Are you done with pumpkin spice everything, everywhere yet? I'll be honest, when the coffee shop advertises "Pumpkin Flavored Lattes," I am not the least bit tempted. It seems the only pumpkin stuff I like is a handful of home baked goods using real pumpkin, and if it is one of my tried and true recipes... then, yes I'll have some more please!

This includes my recipe for Pumpkin Spice Bread. I've tried a lot of pumpkin bread recipes over the years, and never found THE ONE. So I played around adapting from a couple different recipes until I found, The One! It isn't overly sweet, it is nice and moist, and it gets better the next day if you can resist gobbling it all up the first day. No, this isn't a health bread, but I did cut down the sugar and oil amounts from most recipes I came across.
It is also made from the pumpkins we grew in our own garden!

Seriously, you should make this, the smell of it baking in the oven is out of this world!

Pumpkin Spice Bread

Ingredients:
2 cups pumpkin puree (non-sweetened and no spice added)
¾  cup granulated sugar
¾  cup brown sugar
2/3 cup vegetable oil
4 eggs
2 tsp vanilla extract
3 1/3 cups all purpose flour 
2 teaspoons baking soda
1 teaspoon baking powder
1 teaspoon salt
2 teaspoons ground cinnamon
1 teaspoon ground ginger
½  teaspoon ground nutmeg
½ teaspoon ground cardamom
¼ teaspoon ground cloves
1 cup chopped pecans or walnuts

Directions:
Preheat oven to 350F. Grease and flour 2 9x5” loaf pans.

In a large mixing bowl, combine pumpkin, sugar, vegetable oil, eggs and vanilla. Beat until well mixed.

Measure the flour, baking soda, baking powder, salt, spices and nuts into a separate bowl and mix until combined. Slowly add the dry ingredients to the pumpkin mixture until just combined.

Divide the batter evenly between the 2 pans. Bake on middle oven rack for 60 to 70 minutes or until a toothpick inserted in center comes out clean.


Cool for 10 minutes, then remove loaves from pans and let cool completely on a rack. Slice and enjoy!

Monday, June 1, 2015

For the love of Jam


Yes, it's that time of year again. The annual making of The Jam took place this weekend. Fortunately we have a well seasoned team that makes it all the more enjoyable.  Just open the windows to release the steam, crank up the tunes, and get to work!The 3 of us all did our jobs with great efficiency and mostly joy. Notice I said mostly, near the end I admit to getting just a wee bit cranky due to overheating and low blood sugar.


We ended up with 37 jars of jam in total. Nice work team! This morning I baked a batch of biscuits. I then cracked open a fresh jar of strawberry jam and slathered a biscuit with it. I devoured it in less than a minute. So good!

The yearly making of the jam together began way back when The Engineer and I first moved into The Little Green cottage. Now the whole family is part of the tradition. Here's to 11 years of sweetness and kickin' out the jams!


Monday, January 5, 2015

Keeping winter at Bay


"The Bay leaves are of as necessary use as any other in the garden or orchard, for they serve both for pleasure and profit, both for ornament and for use, both for honest civil uses and for physic, yea, both for the sick and the sound, both for the living and the dead; . . . so that from the cradle to the grave we still have use of it, we still have need of it."

Parkinson, ‘Garden of Flowers’ (1629)


Happy New Year all! I hope that the first week of this brand new year has been good to you. It has been good to me and I am feeling the promise of more good days to come. 

Today is the first day back to school and work for our family, I have plenty of to-doing to put the house back together after all the holiday mayhem. The house seems so still and quiet. 

Yesterday, as I looked out at the sparse winter garden I saw that the Bay laurel was still flush with vibrant green leaves. So out I went to harvest some before we get another cold snap. Now as I walk through the kitchen I can smell the scent of Bay from the bunches I hung up for drying and preserving.


Bay Leaves have a long and noble history. The ancient Romans and Greeks used to make crowns out of true Bay Leaves (Laurus Nobilis, Lauraceae) to crown great and accomplished people. These great people usually included kings, war heroes and Olympians. The term ‘baccalaureate’ originates from this giving of bay leaf crowns to signify success, as does the term "poet laureate".

Medicinally, the leaves of the Laurus Nobilis tree, also known as Sweet Laurel, have been used since the ancient times to treat problems associated with the liver, stomach and kidney. They were also used for treating bee and wasp stings. Now, herbalists use bay leaves for treating various health complaints. Some of the reported uses by herbalists and Naturopaths are as follows:
Coughs & Colds: Placing a cloth soaked in water in which bay leaves have been boiled provides relief from cough, cold, bronchitis and chest infections.
Aches & Pains:Essential Oil of bay leaf is massaged on sprained areas and for relieving headaches. The oil also provides relief from swellings, rheumatic and arthritic pain.
Fever:Bay leaves infusion promotes sweating, breaking fever, and flu symptoms.
Digestion:Bay leaves are used for treatment of digestive disorders. 
*Always ask the advice of your doctor before using any remedies.
I will admit that I mostly use mine for cooking, but I have used it medicinally from time to time. I do love the look and scent of herbs hanging to dry. With the garden's herbs mostly died back, I am comforted by my harvest, brightening my kitchen with a bounty of Bay!

Wednesday, November 5, 2014

3 Easy Pieces

Drama is very important in life: You have to come on with a bang. You never want to go out with a whimper. Everything can have drama if it's done right. Even a pancake. - Julia Child


Recently, Pony Girl started attending a cooking class. Oh man, what a great thing! She loves it and comes home so excited to tell me all about what they have made that week. She tells me all the the ingredients they used and how they prepared the food. 
It has even sparked a new trend of her and I cooking together with me teaching her some of the classics. Our lesson on French Toast was a delicious success!

My girl told me she needed me to sew an apron for her, "something special," she said. "Of course," says I! I had just the inspiration, this little vintage apron needed recreating Pony Girl style. The apron is just 3 easy pieces, plus straps and handy dandy pockets.

Basically, I sort of simply traced the lines of the the original pieces along the seams. One center piece and one side piece that you cut twice from the fabric. Then I made adjustments in width and length to fit my girl and added seam allowances.


Since I was at it, why not make it reversible? 2 aprons in one is the best! So, happy retro polka dots on one side, and cheerful hibiscus and hula girls on the other.


Yes, an apron with plenty of drama... just like my girl! I love her new passion for cooking and I'm looking forward to many years of spending time together in the kitchen! 


Monday, July 7, 2014

In a Pickle


It is full on Summer here in Portland. The garden keeps on giving and sometimes you end up with more than you can eat fresh from the garden. So what do you do (other than gift friends and family with produce)? Well, as they say in Portlandia, "We can pickle that!"


So, armed with a handful of carrots, a fistful of Haricot vert (lovely little french green beans), and a few pickling cucumbers; I set about making small batch refrigerator pickles.

I love a refrigerator pickle; all my produce was fresh picked from my garden then ready in jars in under a half an hour. Since no traditional canning methods (water boiling bath or pressure cooker) were needed, it's easy breezy beautiful pickles! I use this method for small batch only, since they only last a little over a month in the fridge. Of course, they often don't last that long because of the eating. There are plenty of Refrigerator Pickle recipes out there on the internet if you want to give it a try.


Ours will be officially ready this afternoon (24 hours after putting up), but they taste even better if you can wait at least a few days to try them. It's really hard to wait.


Do you like pickles? What is your favorite?

I will be announcing the winner of The Better Bag Maker book tomorrow! Still time to enter HERE!

Monday, April 14, 2014

A gathering of sorts - accidental collections


Yes, there are still unpacked boxes at the new house. I wonder when I will stop calling it the new house, when will it stop feeling so new? I do not know. So, every now and then I unpack a box or two and try to find a place to put the stuff. How did we get so much stuff?

As I unpack, I find gatherings of like things that bloom into accidental collections. Things I never set out to collect, things inherited from grandparents, parents, friends...


I never intended to collect Ye Olde Kitchen stuff and yet, the box labeled "Papa" never opened or gone through since it arrived nearly two years ago now from California, held (among other things) a gathering of just that.


My grandmother collected these things. I like them, but then, you all know by now that I like old stuff. I like to think about the lives of old things, the people who touched and used them and the stories of dinners, jars of canned goods, the food that was made. 

I also like the look of them hanging on my kitchen wall. Just a little gathering, an accidental collection...

Now, I'm off to arrange my accidental collection of decorative tins! 
Do you have any accidental collections?


Monday, July 8, 2013

Blue Bee Farm


Have you ever come across a place that is so great that you can't wait to tell people about it? A place that is truly special - so that a tiny part of you sort of wants to keep it a secret too? Well, we have found such a place and it just wouldn't be fair to keep it all to ourselves.  That place is Blue Bee Farm.


The last weekend in June we had a bit of a heat wave here in the Northwest. We had also seen a house that we fell in love with and on Friday, we put in our offer. This is a bit nerve wracking as the last place we put an offer on, we were outbid. To keep our minds off the whole business, we decided to pack up the car and take a drive out to Sauvie Island. Now, Sauvie Island is just a 20 minute drive from our place and is a magical spot. It's landscape is stunning, dotted with farms and wetlands. There are plenty of U-Pick farms to choose from, some of which can get down right crowded on a sunny weekend day.


The Engineer happens to work with a fellow who's family has opened a Blueberry farm on a beautiful piece of land. We made our way to the farm ready to pick some berries in the sun.


Blue Bee Farm is family owned, and the family is truly ace, really the nicest folks you could imagine. No sprays or chemicals are used on the fruit, they practice natural and sustainable farming, and the surroundings are lovely. The scene was so peaceful, we nearly had the place to ourselves. We headed out to the fields with our buckets looking for blueberry gold,
and boy did we ever find it!


Though the bushes may have looked small, they were literally bowing under the weight of masses of big, juicy, ripe and incredibly sweet berries. Every bush was a treasure. Every few minutes Pony Girl would yell, "Jackpot!"


Blue Bee Farm grows several varieties of blueberries, all of them delicious.  In the short time we were there (not much over an hour) we picked an incredible 16 pounds of blueberries without even realizing it!!


It made for an awesome family outing in beautiful surroundings, we had such a fun time. If you live anywhere near the area, I can not recommend Blue Bee Farm enough. Just click on the link to get info, hours and directions. I happen to know that there are plenty more blueberries coming on at the farm, so go get some now! You can also follow them on Instagram HERE and see their beautiful farm and berries!

I know for a fact that Blue Bee Farm will become a family tradition for years to come!  Thank you so much Shanna, John and family for a great experience!


While we froze a good amount of the berries, we ate quite a few fresh. I also made a batch of blueberry syrup, oh man that stuff is good! Here is a basic simple recipe, much like how I made mine if you care to give it a try. It's easy peasy. It is good on everything from ice cream to pancakes and it makes my new favorite summer refresher: Blueberry Soda with Lime and Mint!


Oh I almost forgot to tell you...
We got the house!!!

Happy Monday all!

Tuesday, June 11, 2013

Suddenly Summer


Oh yes, it's suddenly Summer here in the Pacific Northwest! With the beautiful weather comes the last week of school, friends gathering for barbecues, Popcicle consumption, Farmer's markets, and busy times.
Excuse me if I am a little scarce this week as I will be doing a bit of THIS...

...looking for one of these,


and getting out in the garden to tame the wild,


and apparently taking photos with my phone.

I do want to remind you that I am Guest Editor for the month of June over on WhipUp. There is a great Ebook offering from my friend Nancy Langdon, designer behind studioTANTRUM/Fledge and proceeds go to a really good cause, you can find it HERE. My latest offering is an ode to eating local and our glorious farmer's market HERE. You can also find a couple of great book reviews in the mix, so please head on over to take a look!

Have a beautiful day all!

Monday, May 6, 2013

All about a sandwich


Yes, that's right. This post is all about a sandwich; and why not? My blog title is "Lola Nova - Whatever Lola Wants" and right now Lola wants a sandwich. This sandwich! Are you thinking to yourself, 'Is she really doing an entire post all about a sandwich, really?' Oh yes I am indeed. It is my new favorite lunch and lunches can be tricky for me, so I get a little worked up when I come up with something good. And this is good.

It goes like this:
Get yourself some farmer's cheese, the spreadable kind. The type I can find locally looks like this...


If you can't find any, you can substitute Neufchatel or Cream Cheese. Then you want to add fresh herbs and... well here, I'll just give you the recipe.

Herb Cheese Spread Recipe
8 oz. Spreadable Farmer's Cheese
2 Tablespoons plain Greek yogurt
A squeeze of fresh lemon juice
1 Tablespoon chopped fresh thyme
1-2 Tablespoons chopped fresh Italian Parsely
1-2 Tablespoons chopped fresh Basil
1 small garlic clove minced
salt and pepper to taste

Mix all of the ingredients together in a small bowl. Lasts in the fridge for a week.


 Now build the sandwich:
A couple of slices of whole grain bread toasted. (If you are really ambitious and want to bake your own THIS RECIPE is one of my go-to breads. It is very adaptable and tasty.)
Spread a layer of the Herb Cheese Spread on the toasted bread.
Add some thick slices of tomato and avocado. Throw on some sprouts and fresh spinach and voila! Everything a lunch should be, good and good for you.

"Too few people understand a really good sandwich."  James Beard

Oh, and Happy Monday!


Wednesday, November 7, 2012

In The Kitchen with Lola - Banana Berry Applesauce Walnut Bread!


I thought I would take a break from my travel tales to share a recipe with you today. It was one of those happy accidents that come from a sudden necessity to diverge from one's original plan.

I had some over ripe bananas and a need to bake, but not enough banana to make my usual favorite banana bread. After hunting for recipes calling for 1 and 3/4 ripe bananas and ending up nowhere, I figured I'd just wing it and hope for the best. What else do I have on hand that isn't quite enough to make a tried and true recipe that I could throw in to make up something entirely new?

And so...

Banana Berry Applesauce Walnut Bread was born, and it is good!

While I didn't measure everything I wrote up a recipe immediately after tasting that should do the trick.

Banana Berry Applesauce Walnut Bread

Dry ingredients:
2 Cups All Purpose Flour
3/4 Cup Sugar
3/4 tsp. Baking Soda
1/2 tsp. Salt
Aprox. 1 Cup Chopped Walnuts
1 tsp. Cinnamon
1/4 tsp. Nutmeg

Wet ingredients:
Aprox. 2 very ripe Bananas mashed (about 1 cup)
2/3 Cup Unsweetened Applesauce
1/2 Cup Plain yogurt
2 Eggs lightly beaten
4 Tbs. Butter melted and cooled (you could use veg. oil as well)
1 tsp. Vanilla Extract
1 Cup Frozen Berries

Preheat oven to 350 degrees with rack on lower middle shelf.
Grease and lightly flour one large loaf pan or 2 smaller loaf pans and set aside.

Mix all the the dry ingredients in a large mixing bowl.
Mix all of the wet ingredients in another bowl.

Pour wet ingredients into the dry ingredients and mix until just incorporated. Lumpy batter is good.

Pour the mixture into loaf pans and bake in oven for aprox. 40 minutes if using 2 smaller loaf pans and aprox. 60 minutes if using one large loaf pan; until you stick in a toothpick to the center and it comes out clean.
Baking times may vary!
Let the bread sit in the pan for 5 minutes then turn onto cooling rack to let cool completely or as long as you can stand it before cutting into it and gobbling it up!


And yes, it is a bit more cake than bread, but never mind that, it is delicious!

Happy baking!

Tuesday, May 29, 2012

Millet Salad

Goodness me oh my, I have fallen rather behind! This was supposed to be posted on Friday, but then...

Anyway, today's offering is of the foodie variety. As we head into summer, I try to come up with yummy, make ahead salads to keep on hand. I throw together some veg, grain and protein for a well rounded, healthy nosh. I thought I'd share a recipe for a Millet and vegetable salad that makes a lovely side dish, or if you are like me, you might like to eat it as a meal for lunch, or a late afternoon snack when you could use a little boost.

Millet seems to be a grain that has fallen out of fashion a little here in the US; I recall it being a big deal in the late 70's health food circuit. I keep it on hand for breads and cereal mostly, but it makes a wonderful grain for salad as well.

Broccoli, Cauliflower, Chickpea and Millet Salad with Tahini-Lemon Dressing

1 c millet
2 c water
1/2 head broccoli, broken into florets
1/2 head small cauliflower cut into florets
1 can chickpeas, drained & rinsed
3-4 scallions chopped
zest of 1 lemon


dressing:
1 garlic clove, minced
3 T tahini
4 T olive oil
2 T hot water (more if necessary)
juice from 1 lemon
salt & pepper
*1-2 T almond butter or peanut butter (optional)

Begin by draining and rinsing the chickpeas, set aside.

Toast millet in a small saucepan on medium heat, stirring often, until it starts to crackle. Add water, cover and bring to a boil. Reduce heat and let simmer until all of the water is absorbed.

Steam broccoli and cauliflower until just slightly tender or broccoli is bright green, drain and rinse under cold water. You could omit the cauliflower if you are not a fan, or use another combo of vegies altogether.

In a large bowl combine the Millet, steamed vegetables, chopped scallions, chickpeas lemon zest and toss.

Make the dressing by combining and whisking all of the ingredients together, add water as needed to get the right consistency. * Note: The brand of tahini I have on hand is a little bitter, so I added a couple of Tablespoons of almond butter to the dressing to smooth it out, adding peanut butter would have the same result. I suggest making the dressing without, and then having a taste to see how you like it. Oh, I also added a little over a teaspoon of honey to the dressing!

Add half of the dressing to the millet mixture and toss until incorporated.


You can add a base of baby greens with the salad and serve with a lemon wedge. Drizzle some of the remaining dressing over the top. I found it quite good with a dollop of plain yogurt on top too!

Enjoy!


Wednesday, November 2, 2011

In The Kitchen with Lola

What's for breakfast?

'Tis the season for muffins and these little beauties make a lovely breakfast treat. Wholesome and chock full of goodness; with options, I love options. Not too sweet, but definitely tasty!

Applesauce Apricot and Berry Muffins

Makes 12-15 muffins

3/4 cup whole wheat flour
1/2 cup all purpose flour
1 1/4 cups oats
1 tsp baking powder
1/2 tsp baking soda
1/4 tsp salt
1/2 tsp cinnamon
1/8 tsp nutmeg
1/2 cup chopped dried apricots
1/2 cup chopped nuts
3/4 cup blueberries (fresh or frozen)
1 cup unsweetened applesauce
1/2 cup low-fat buttermilk
1/2 cup firmly packed brown sugar
2 Tbsp canola oil
1 large egg, lightly beaten
1 tsp. vanilla extract
Preheat oven to 375 degrees.

Line a 12 cup muffin tin with paper cases or spray with nonstick cooking spray.

In a large bowl combine flour, oats, baking powder, baking soda, salt,cinnamon, nutmeg, apricots, nuts and berries. In a medium bowl combine applesauce, buttermilk, sugar, oil, egg and vanilla. Make a well in dry ingredients and add applesauce mixture. Stir until just moist. Fill muffin cups 2/3 full.

Bake for 16-18 minutes.

And now for those options I mentioned:

You can use all whole wheat flour if you desire.
Try substituting the apricots and berries for any of the following:
Dried Cranberries, Walnuts, and Orange Zest
Dried Dates and Almonds
Chopped Apples, Raisins and extra Cinnamon
Any other yummy dried fruit and nuts you have on hand!

Enjoy!

Wednesday, September 14, 2011

Harvest

Today I had intended to share a story about a long lost wandering soul who has recently returned to the bosom of the the family here in the little green cottage. It seems though, that I am still ferreting out the details of this epic tale and will have to save it for another time.

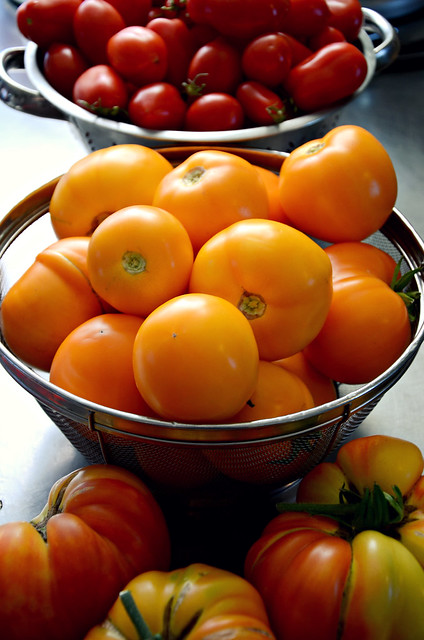
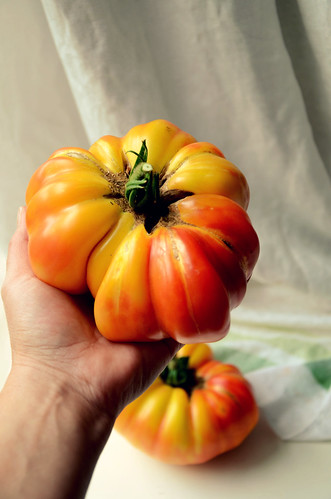
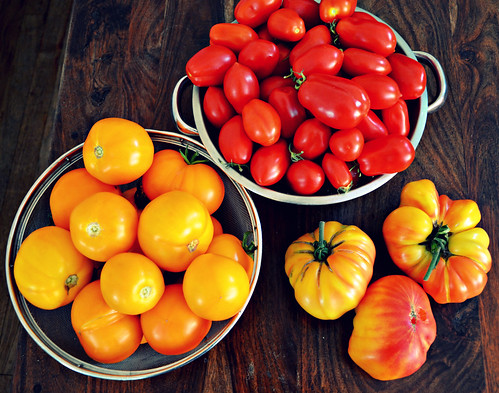
So today you get tomatoes. A great big heaping helping of tomatoes!

Did I say BIG?

2011 turned out to be a pretty good year for the tomatoes, the best we've had in about 3 - 4 years. That last little burst of hot weather kicked it into full gear. Of course even with sharing some with neighbors and eating plenty ourselves, we still had a small mountain of them.

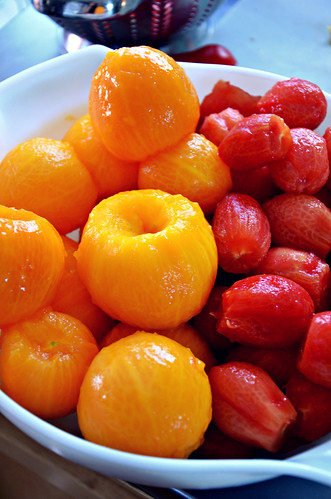
So...on one of the hottest days of the year, in a very steamy and also very tiny kitchen, I began to blanch and peel and prep.

Normally I would can the whole toms, or turn them into a basic sauce, but this year I decided on Salsa!
In the pot went: onions, garlic, sweet peppers from the garden, jalapeños, cilantro, cumin, pickling salt, sugar (just a pinch), and a combo of red wine vinegar and cider vinegar.
It cooked down just gorgeous! Now we are set with salsa for many months to come. I love putting up food (ok I didn't love how hot it was, or how my fingers were made raw with all the prep, but it's totally satisfying and worth it!)


I'll be back on Friday with a happy how-to! See you then.