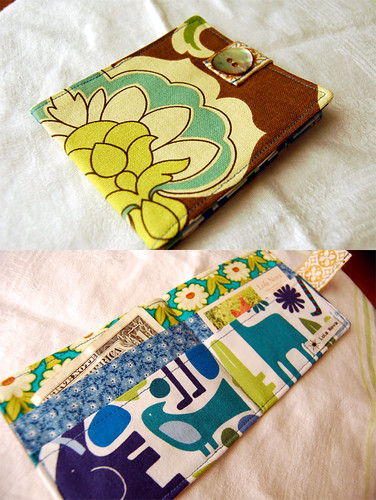
As promised, direct from The Scrap Lab, The Summer Wallet tutorial!
First, a little bit about these wallets; they are meant to be a little loose and flexible. Perhaps I should say, they are free-spirited, ready to go at a moments notice...to the beach, a festival, fair, hike or farmer's market. Right, on with the show.
Details, details...
Materials:Some fabric scraps
Medium weight fusible interfacing
Various trims
4" piece of narrow elastic
Button
Thread
Cutting guide:Fabric A = cut one 9 1/2" X 4 1/2" rectangle (this is going to be the outside of your wallet. I recommend using a heavier wt. fabric like home decor, denim, canvas, etc.)
Fabric B = cut one 9 1/2" X 4 1/2" rectangle (inside of wallet)
Fabric C = cut one 9 1/2" X 6 1/2" rectangle (pocket 1)
Fabric D = cut one 9 1/2" X 5" rectangle (pocket 2)
Interfacing = cut one 9" X 4" rectangle
Please forgive the photos, they were taken in my dark as a mine basement sewing room, with a flash. Do click on them to magnify if you need a close up.
First, center the fusible facing on the wrong side of
Fabric B and fuse following the manufacturers instructions, set aside.
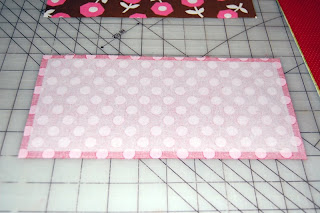
Now, take your
Fabric C & D rectangles and fold them in half lengthwise, wrong sides together and press with an iron. You can then top stitch close to the folded edge. These are your two pockets.
Take your interfaced
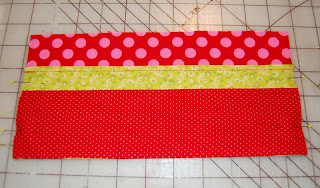
Fabric B and lay it right side up in front of you. Place your
Fabric C pocket on top matching bottom and side raw edges. Repeat with Fabric D pocket. Pin in place, baste layers together close to the raw edges.
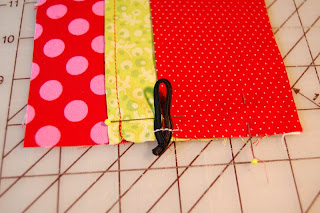
Twist elastic into a loop, pin to the center of the right end on top of the stack, baste in place. (With the loop part of elastic facing in)
Next, it's time to get creative! Pull out your ribbons and trims and play around with them until you are tickled with the result. Attach them to the right side of one end of your
Fabric A rectangle, like so...(I just sewed on some ribbon and ric-rac)
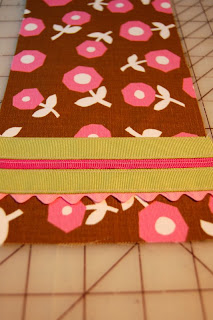
Take
Fabric A and place on top of stack right sides facing, matching all raw edges. Making sure that the embellished end of Fabric A is opposite the end with the elastic loop. Pin in place and stitch through all layers with a scant 1/4" seam allowance, leaving a 3 inch opening at the top long edge for turning.

Now clip your corners.
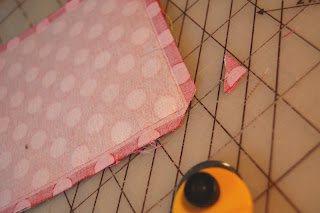
It's time to turn your wallet right side out, taking time to shape it nicely. Turn the seam allowances of the top opening towards the inside and press thoroughly. Top stitch 1/8" around all outer edges.
Now find the center point of your wallet on the inside. I use a ruler and a fabric marker or quilting pencil to mark a line down the middle. Stitch down the line from bottom to top with a straight stitch to create divided pockets.

Fold the wallet in half and press carefully along fold on outside. Mark button placement according to elastic on front of wallet and hand sew a button to the front.
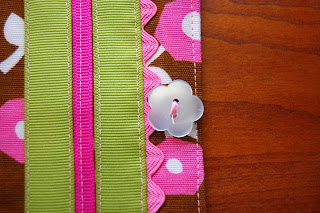
All that is left is for you to grab your essential wallet fare and head out on an adventure!
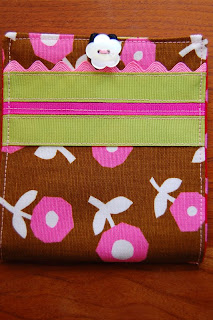
Extra Bits:
*You do not have to use all different fabrics, do whatever suits your fancy.
*Using old jeans, curtains, tea towels...for this project is a great way to recycle.
*You can choose a different closure method than the elastic. Such as; snaps, Velcro, magnetic closures and in the case of the wallet I made for myself, I added no closure at all.
*If you have any questions, or suggestions to make this tutorial better, just drop me a line.
If you make one of these wallets I would love if you emailed me a picture lolanovainfo@gmail.com.
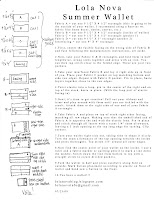
Here is a rough sketch and reference for print out. Just click on the picture below and print.
Thank you and happy sewing!

 Welcome to my weekend project, part of it anyhow. There is more, in bags, on shelves, strewn on the tables and floor of my studio, and coming out of my ears. Scraps, loads of scraps, mountains of scraps. They are taking over...what to do? Organize, purge, make the craziest quilt ever? Hmmmm...