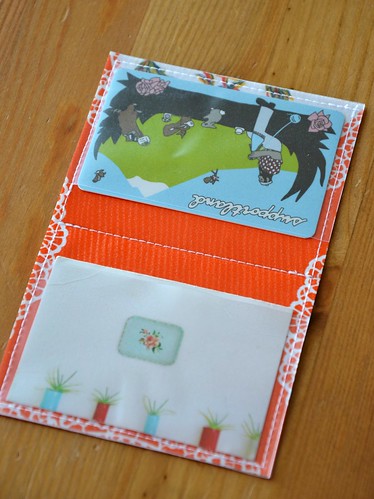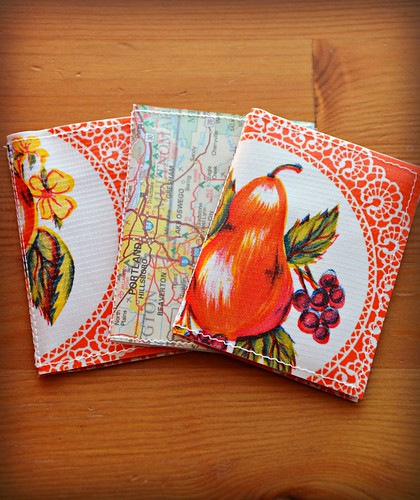
Necessity is the mother of invention. So yesterday my need for a slim little card carrying wallet kicked me into action and invention.
Recently, I attended a three day music and camping festival. It was hot and there was a lot of walking and wandering to be done at such an event. The trick is to carry a minimal amount of accoutrements on ones person, besides the ever present water bottle I wore a wee festival purse, nice and light weight with only the essentials. My wallet had to be left behind as it suffers from a spot of the syndrome known as The Costanza Wallet. What with my ID, credit cards, debit cards, library cards, health cards for the entire family, grocery market member cards, local business support cards, various business cards, and etc., It takes up a heap of room and getting out my ID and importants is a struggle. However, I found having these things loose in my wee festival bag was precarious, and I wished I had something compact and useful for the few necessary cards I was carrying. Something like a handy free-style pocket, as I am rather fond of a handy pocket don't you know.
I have found that such an item is not just good for the carefree festival days, but indeed an all year round, every day sort of good. Since I am not one to scour the interwebs for just the perfect item, or spend hours looking for a how-to that isn't exactly right; I simply got to work with a couple of scraps and my sewing machine.
The result was so quick in the making and most excellent in the cute and useful department that I thought I just had to share it with all of my friends here! So, enough of my rambling ways, let us get on with the Tutorial (the nitty gritty details)!
Ingredients:
A scrap of oil cloth - measuring at least 12" x 7" (30.5cm x 18cm)
A scrap of clear vinyl fabric - measuring at least 7" x 5" (18cm x 13cm)
Ruler, thread and scissors
Note:
You can find oil cloth and clear vinyl fabric in many fabric stores and some craft stores, and of course there are many sources on-line.
Note of disclaiming: My inches to centimeters conversion is approximate and untested, just sayin'.
Instructions:
Cut 2 pieces of oil cloth measuring 3.75" x 5.75" (9.5cm x 14.6cm)
Cut 2 pieces of clear vinyl measuring 2.25" x 3.75" (5.75cm x 9.5cm)
Place the 2 pieces of oil cloth together with wrong sides facing, raw edges meeting.
Place the 2 vinyl pieces even with the inside outer short edges of the oil cloth as pictured. (It is up to you to choose what side you want to be the inside of your wallet)
Take your arrangement to the sewing machine, using a straight stitch, sew 1/8" (3mm) from the edge and through all layers making sure to back stitch at the beginning and end of stitches.
This is the only tricky part as the materials are a bit slippy. If you are having particular trouble with slippage, use a bit of tape to hold the pieces together then remove them after stitching. I managed to contort my hands awkwardly enough to keep it together without tape, but it took some practice.
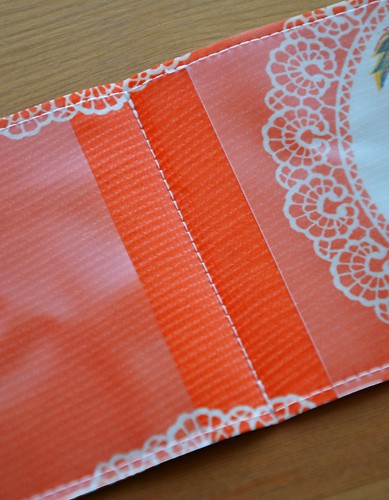
Once you have sewn the layers together, fold the wallet in half and finger press a crease down the middle. Sew a row of stitching down the crease as shown. Re-fold the wallet in half along the stitch line.
Next you need to... oh wait, you are done already! Holy smokes that was fast! Your Quick sticks card caddy is ready for action!
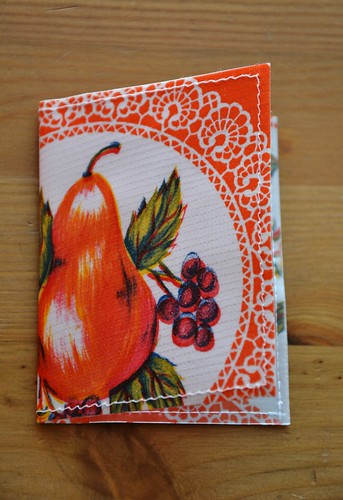
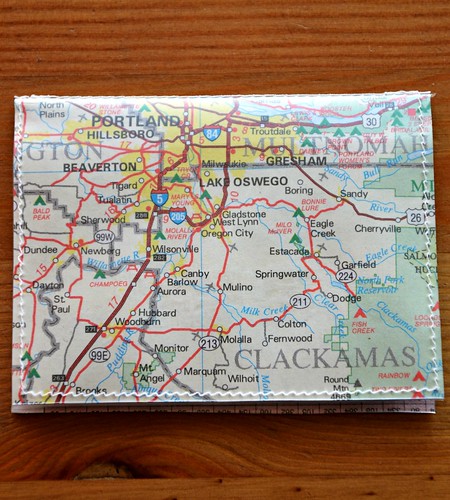
Once you make the first one and realize how easy and quick this project truly is, you'll want to make some more. I made 3 in no time! I even tried out making one from all clear vinyl, then slipped a cut piece of an old map in between the outside and the lining, tres hip no?
Uses:
ID Holder
Card Caddy
Business Card Carrier
Gift Card Presenter
Slim Bi-fold
Stocking Stuffer
and on, and on...
You could make the wallet with out the clear vinyl, you just wont be able to see through to the cards. You could make it out of felt as well.
Well, I do hope you have enjoyed this quick stitch tutorial! If you have any questions, ask away. And as always, if you make one I would love to know about it; please upload a photo of your card caddy to my Flickr group HERE!
Happy Stitching!
Showing posts with label wallet. Show all posts
Wednesday, August 15, 2012
Friday, November 18, 2011
Winners!
My goodness! I am overwhelmed by the response to my little wallet give away! It was so much fun to read what you all had to say about winter. Thank you for sharing with me.
Now, I was trying to come up with a clever way to pick a winner, but to be honest, I was up a little late last night with The Engineer playing a benefit concert and my brain is not at it's most clever today. So, I put in a call for help to The Engineer at work. Fortunately, he and his partner were very clever indeed and even offered to take care of the whole business and to provide photos! What luck!
Many Thanks to The Engineer and The Mad Drafter!
Each entry was given a number.
Here is the Engineer, what is he going to do?
Ooh, a rubber band pencil shooter!
Oh my, he's blindfolded too! I suggest standing a safe distance away. And he shoots!
#39 is a winner!
He shoots again!
#24 is a winner!
# 39 is Jamboree of Whitley Bay who said : "Winter, for all it brings the cold and dark nights, love to think something magical is waiting to happen. The first snowfall, the hope of an adventure with James and the Snowman. Christmas, a time with family and reminiscing about childhood, reading a good book all snuggly inside and sipping hot chocy."
and #24 is Andrea Creates who said: "i looove these wallets :)
i also love the holidays~ my favorite part of winter"
Please send your mailing info to me at lolanovainfo@gmail.com and I will pop those in the post first thing next week.
A big thank you to everyone for playing along it was a blast!
Also, I wonder how much actual work is getting done at the Engineer's office today...
Have a fantastic weekend all!
Now, I was trying to come up with a clever way to pick a winner, but to be honest, I was up a little late last night with The Engineer playing a benefit concert and my brain is not at it's most clever today. So, I put in a call for help to The Engineer at work. Fortunately, he and his partner were very clever indeed and even offered to take care of the whole business and to provide photos! What luck!
Many Thanks to The Engineer and The Mad Drafter!
# 39 is Jamboree of Whitley Bay who said : "Winter, for all it brings the cold and dark nights, love to think something magical is waiting to happen. The first snowfall, the hope of an adventure with James and the Snowman. Christmas, a time with family and reminiscing about childhood, reading a good book all snuggly inside and sipping hot chocy."
and #24 is Andrea Creates who said: "i looove these wallets :)
i also love the holidays~ my favorite part of winter"
Please send your mailing info to me at lolanovainfo@gmail.com and I will pop those in the post first thing next week.
A big thank you to everyone for playing along it was a blast!
Also, I wonder how much actual work is getting done at the Engineer's office today...
Have a fantastic weekend all!
Friday, November 11, 2011
Happy Friday Giveaway!
I am however, looking forward to the New Year, when the massive project I've been working on will be mostly over but for the clean up, and I can get back to a more normal routine.
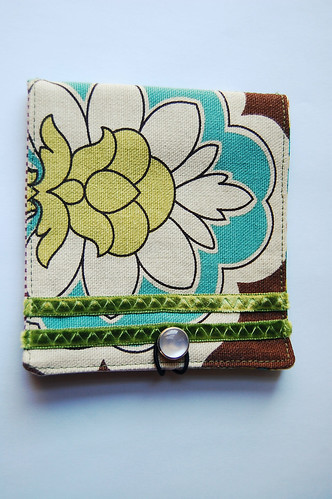
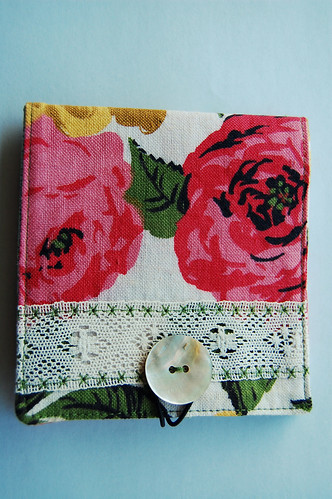
I'm giving away the two Flirty Fabric Wallets I made for Issue 5 of Mollie Makes Magazine. Think of it as an early holiday present.
That means there will be two winners! I will ship anywhere. All you need to do to have a chance to win is to leave me comment here on this post telling me what you love most about winter. Also, let me know your wallet preference. Easy Peasy!
The giveaway will be open until Thurs. November 17th midnight, and the winner will be announced next Friday!
Have a wonderful weekend all!
Thank you all for your wonderful comments, I so enjoyed reading them! The winners have been announced HERE!
Saturday, November 14, 2009
More Happy
Holy mackerel, it's a Saturday post! Just thought I would pop in and wish you all a lovely weekend. That and a little shameless self promotion. Lola Nova's Summer Wallet Tutorial has been featured on Sew Mama Sew for the 3rd annual Handmade Holidays! If you haven't been over to check it out, you really should. For the month of November they will be featuring some of the cleverest and cutest tutorials and how tos from blogland. All to help you make it a handmade holiday for you and yours. There is still plenty of time to whip up some of the beauties found on their site. Very cool.
Another happy thing, or should I say 'the latest obsession', has been keeping me going in circles. The Bearded One is beginning to worry. I still have not sorted it all out yet, so I am going to keep it under my hat a while longer. There is a little hint in the picture above though.
Well, now that I have indulged in the rare Saturday post, I'm off to scrounge a proper breakfast from the kitchen's contents. Wish me luck!
Thursday, July 23, 2009
Summer Wallet Tutorial
As promised, direct from The Scrap Lab, The Summer Wallet tutorial!
First, a little bit about these wallets; they are meant to be a little loose and flexible. Perhaps I should say, they are free-spirited, ready to go at a moments notice...to the beach, a festival, fair, hike or farmer's market. Right, on with the show.
Details, details...
Materials:
Some fabric scraps
Medium weight fusible interfacing
Various trims
4" piece of narrow elastic
Button
Thread
Cutting guide:
Fabric A = cut one 9 1/2" X 4 1/2" rectangle (this is going to be the outside of your wallet. I recommend using a heavier wt. fabric like home decor, denim, canvas, etc.)
Fabric B = cut one 9 1/2" X 4 1/2" rectangle (inside of wallet)
Fabric C = cut one 9 1/2" X 6 1/2" rectangle (pocket 1)
Fabric D = cut one 9 1/2" X 5" rectangle (pocket 2)
Interfacing = cut one 9" X 4" rectangle
Please forgive the photos, they were taken in my dark as a mine basement sewing room, with a flash. Do click on them to magnify if you need a close up.

First, center the fusible facing on the wrong side of Fabric B and fuse following the manufacturers instructions, set aside.

Now, take your Fabric C & D rectangles and fold them in half lengthwise, wrong sides together and press with an iron. You can then top stitch close to the folded edge. These are your two pockets.
Take your interfaced Fabric B and lay it right side up in front of you. Place your Fabric C pocket on top matching bottom and side raw edges. Repeat with Fabric D pocket. Pin in place, baste layers together close to the raw edges.

Twist elastic into a loop, pin to the center of the right end on top of the stack, baste in place. (With the loop part of elastic facing in)

Next, it's time to get creative! Pull out your ribbons and trims and play around with them until you are tickled with the result. Attach them to the right side of one end of your Fabric A rectangle, like so...(I just sewed on some ribbon and ric-rac)

Take Fabric A and place on top of stack right sides facing, matching all raw edges. Making sure that the embellished end of Fabric A is opposite the end with the elastic loop. Pin in place and stitch through all layers with a scant 1/4" seam allowance, leaving a 3 inch opening at the top long edge for turning.

Now clip your corners.

It's time to turn your wallet right side out, taking time to shape it nicely. Turn the seam allowances of the top opening towards the inside and press thoroughly. Top stitch 1/8" around all outer edges.
Now find the center point of your wallet on the inside. I use a ruler and a fabric marker or quilting pencil to mark a line down the middle. Stitch down the line from bottom to top with a straight stitch to create divided pockets.

Fold the wallet in half and press carefully along fold on outside. Mark button placement according to elastic on front of wallet and hand sew a button to the front.

All that is left is for you to grab your essential wallet fare and head out on an adventure!

Extra Bits:
*You do not have to use all different fabrics, do whatever suits your fancy.
*Using old jeans, curtains, tea towels...for this project is a great way to recycle.
*You can choose a different closure method than the elastic. Such as; snaps, Velcro, magnetic closures and in the case of the wallet I made for myself, I added no closure at all.
*If you have any questions, or suggestions to make this tutorial better, just drop me a line.
If you make one of these wallets I would love if you emailed me a picture lolanovainfo@gmail.com.
Here is a rough sketch and reference for print out. Just click on the picture below and print.

Thank you and happy sewing!
Wednesday, July 22, 2009
Pulp Sewing
I've been doing some summer sewing. It's like summer reading, nothing too intense, just light, easy and fun. Projects that come in under the 2 hour mark seem to fit the bill. I found a breezy little sundress pattern in the May 2009 issue of Sew Hip Magazine, by Oliver + S. It looked like a quick sew...so, I jumped right in. The whole thing took about an hour and a half to finish, super easy and very cute. Of course I made it a size too big, which is better than a size too small I suppose. I used all vintage fabrics, the bicycle print is one of my favorites (wish I had more of it). Here is my jumping jack model sporting her dress not quite hemmed yet.

Then there are these little bits of whimsy:

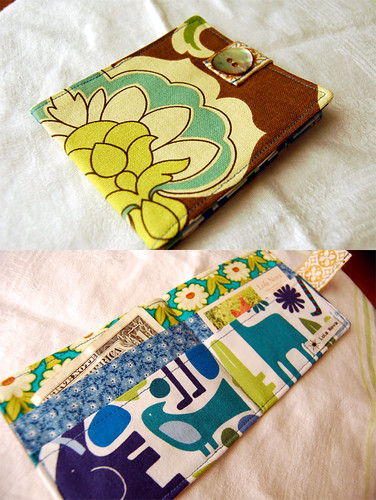
Summer wallets! Just big enough to carry the essentials, so that you wont be weighed down whilst off on a grand Summer Adventure. These belong in Tales from the Scrap Heap, since they are great for using up scraps of fabric from your stash. They are so much fun to whip up that I think I'm getting a little carried away.
I made up a simple pattern, tweaked it a couple of times, and now have it down. So, the big news is...
The next time I post, I will have a tutorial on how to make a summer wallet or 5 for yourself!
What have you been making this summer?

Then there are these little bits of whimsy:

Summer wallets! Just big enough to carry the essentials, so that you wont be weighed down whilst off on a grand Summer Adventure. These belong in Tales from the Scrap Heap, since they are great for using up scraps of fabric from your stash. They are so much fun to whip up that I think I'm getting a little carried away.
I made up a simple pattern, tweaked it a couple of times, and now have it down. So, the big news is...The next time I post, I will have a tutorial on how to make a summer wallet or 5 for yourself!
What have you been making this summer?
Subscribe to:
Posts (Atom)