Wow, I'm really taking this "unplugged" thing seriously! We have been busy and it has been good to take a little time away from the computer and spend it with my family. I have also taken the chance to do some summer reading.
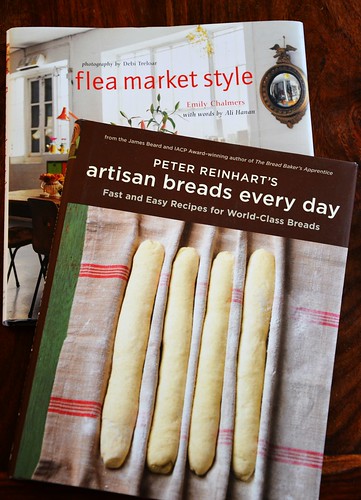
These two books were a little present to myself. Flea Market Style by Emily Chalmers has long been on my wish list, but I don't usually splurge on "Eye Candy" type books. I am so glad I did, especially since I found it in a lovely local shop at a good discount. It has made for some day-dreamy afternoons in the garden over an iced tea.
Peter Reinhart's Artisan Breads Every Day, was recommended to me by the owner of the same local shop. I haven't dived in yet to make any thing from it, but the pictures alone have my mouth watering, and reading some of his tips makes me think this might be a good one.
We have taken up travelling downtown every 2 weeks to the Central Library, a grand old brick place with marble stairs and 4 floors of books! I'm a library fanatic from way back, and to this day I experience a happy rush of anticipation upon entering those book filled buildings. The children's room of the Central Library is bigger than the whole of our neighborhood library, so Pony Girl thinks it's pretty great too.
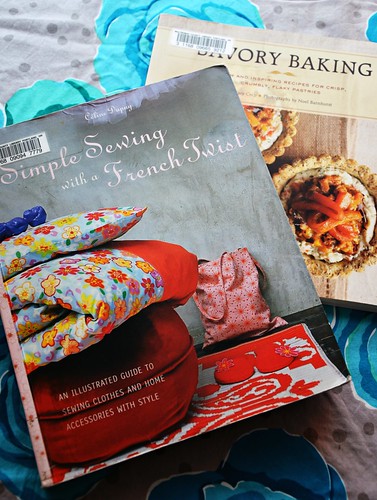
Pictured: Simple Sewing with a French Twist by Celine Dupuy and Savory Baking by Mary Cech
The library is a fantastic way to try out a craft or cookbook before purchasing. I have made some rather good choices this way and not been disappointed. It is also a wonderful place to discover hidden gems!
I am also enjoying an indulgence in magazine gazing lately. Loving Tree Fall's "Princess and the Pea" Doll pattern in issue 16 of Mollie Makes. A local foody mag is good for seasonal dinner ideas. Hmmmm...I think I may be starting to see a pattern in my reading material here.
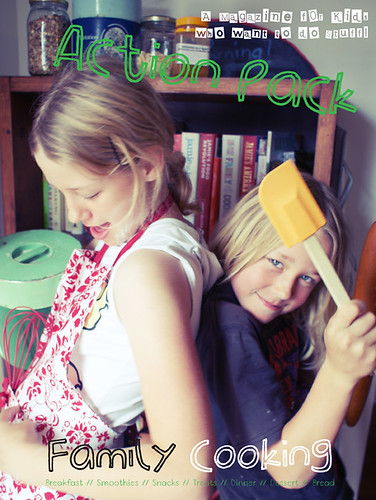
Last but certainly not least, I ordered Action Pack Family Cooking edition 2012 and we are so excited to get cooking! We are definitely a family that enjoys cooking together and this issue looks fantastic with printable recipe cards!
I love Action Pack! Never heard of it? It is a downloadable magazine for kids (and the rest of the family) No ads, just great stuff! Put together by the multi-talented Kathreen Ricketson of Whip Up, this series of magazines is awesome with a great range of topics! So, if you have kids, grand-kids, nieces, nephews, friends with kids, you should check it out.
So, what are you reading?
Tuesday, July 24, 2012
Monday, July 16, 2012
Lola Unplugged
Hello there!
Goodness me, where does the time go? I'm having a twinge of vertigo whilst looking at the calendar and realizing it is well past half of July! We finally got the go ahead on Summer with the weather turning golden on the 4th. Since then we have been well and truly Summering. So, I have "unplugged" and busied myself with the great outdoors and some wonderful times with my girl (& The Engineer when he is home from work) during the school break. I have even been so caught up in the doing and living that my camera keeps getting left behind and all I have to show are a few quick snaps from my phone!
There has been a bit of feasting from the garden...
There have been picnics in the park...
A good amount of monkeying around on playgrounds...
A quick pickle here and there...
As well as a not quite so quick bit of pickling...
There have been some super cool experiments...
Magic Ice Orbs created by putting a few drops of food coloring into a balloon, then fill the balloon with some water, tie off and freeze over night. Remove balloon and voila! Super cool!
There was a grand day at the river...
A bit of girly fun...
And a heavenly batch of home made, hand churned blackberry ice cream!
There was also a rousing family water balloon fight in the back yard and I was the winner! Well, if by winning you mean the the one who most resembled a drowned rat. And no, I haven't any photos of that.
So, forgive me if my posts are spotty, my replies and communications iffy for the next little while. This being "unplugged" is just too much fun!
I do hope that wherever you are, no matter the weather, that you too are having a bit of fun!
Goodness me, where does the time go? I'm having a twinge of vertigo whilst looking at the calendar and realizing it is well past half of July! We finally got the go ahead on Summer with the weather turning golden on the 4th. Since then we have been well and truly Summering. So, I have "unplugged" and busied myself with the great outdoors and some wonderful times with my girl (& The Engineer when he is home from work) during the school break. I have even been so caught up in the doing and living that my camera keeps getting left behind and all I have to show are a few quick snaps from my phone!
There has been a bit of feasting from the garden...
There have been picnics in the park...
A good amount of monkeying around on playgrounds...
A quick pickle here and there...
As well as a not quite so quick bit of pickling...
There have been some super cool experiments...
Magic Ice Orbs created by putting a few drops of food coloring into a balloon, then fill the balloon with some water, tie off and freeze over night. Remove balloon and voila! Super cool!
There was a grand day at the river...
A bit of girly fun...
And a heavenly batch of home made, hand churned blackberry ice cream!
There was also a rousing family water balloon fight in the back yard and I was the winner! Well, if by winning you mean the the one who most resembled a drowned rat. And no, I haven't any photos of that.
So, forgive me if my posts are spotty, my replies and communications iffy for the next little while. This being "unplugged" is just too much fun!
I do hope that wherever you are, no matter the weather, that you too are having a bit of fun!
Tuesday, July 10, 2012
Just call me Grasshopper: Lessons from a 7 year old Master
About a week ago I posted this to The Twitter:
“Today I am in breathless awe of my child. I learned some really big, truly amazing, & very important things about life thanks to her.”
So true was this thought, so intense was this feeling; that I felt a visceral imperative to write it down and send it ‘out there’.
One of the really big lessons was about trusting myself as a mama, trusting that I know my kid and that we are "in tune" with one another much of the time. The second part of this lesson is trusting her and knowing that when she is allowed to be truly herself, she feels safe and happy and can accomplish great things.
Another very important lesson is this: Yes I Can!
Last week we were a couple of hours away from heading to a play date and Pony Girl turned to me and said, "I want to sew a dress Mama."
"Ok," says I, "Maybe tomorrow we can try."
"No, now! I want to make a dress for my play date."
"Honey, we don't have time, we can't make a dress right now." I reply.
"Yes I can!" She says with absolute certainty.
"I'm sorry honey, we can't."
So she walks up to me, cups my face in her hands and says, "It's o.k. mom, trust me. Yes I can."
And she did!
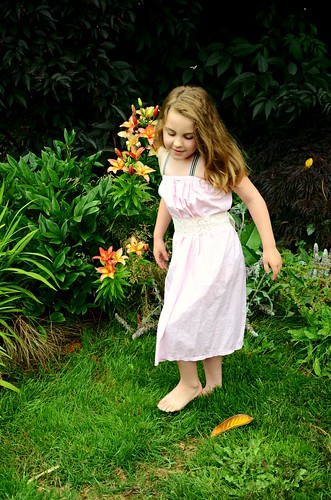
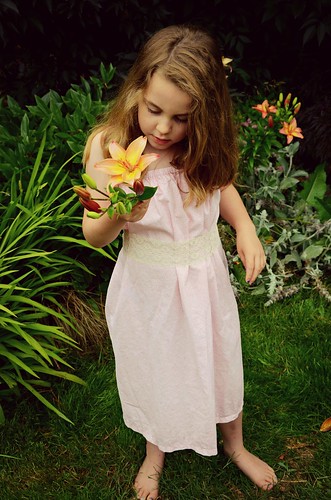
We made a sketch, chose the fabric, had a plan and just started. She has used my sewing machine only once before to sew a simple square of fabric, but this was a whole dress! I did the ironing parts and she, this amazing kid, sewed every seam, hem, and detail on her dress! Going slow, "It is important to be careful and slow so I make less mistakes." she says. Her concentration is total. I tell her to keep the fabric straight and...and...hover. She tells me, "Mom, I got it, don't worry, relax!"
Why am I so surprised? She told me she could do it, she knew she could do it, and she did. Not only is my crafty mama's heart bursting with pride that my 7 year old made her very first dress, but my lion mama heart wants to show and tell the world what this awesome kid has done! More specifically, I want to show her 1st grade teacher. The one who said she couldn't focus, the one who wanted to wash her hands of her when she couldn't force the results she wanted out of Pony Girl, the one who said she belonged in an alternative placement classroom (I visited 2 of those classrooms) where she so very obviously did not fit the criteria, and the one who made her feel less than.
As I watch her play with her friends, overhear her say, "Sure, I can make you a dress too!" as she walks up to kids on the playground and introduces herself and asks if they want to play...I want to tell that teacher that her tremendous concern over Pony Girl's lack of social skills is entirely unfounded.
See, if you listen to them, if you trust them, if you encourage them, if you let them be themselves, if you can shift your perspective and really see them, if you believe in them - they might just believe in themselves.
Yes, I learned that from her. I keep learning how truly amazing life is, how good it can be despite all of the challenges; how sometimes when we learn how to navigate through some of those challenges, we find out we are the heroes of our own lives.
She is my hero!
“Today I am in breathless awe of my child. I learned some really big, truly amazing, & very important things about life thanks to her.”
So true was this thought, so intense was this feeling; that I felt a visceral imperative to write it down and send it ‘out there’.
One of the really big lessons was about trusting myself as a mama, trusting that I know my kid and that we are "in tune" with one another much of the time. The second part of this lesson is trusting her and knowing that when she is allowed to be truly herself, she feels safe and happy and can accomplish great things.
Another very important lesson is this: Yes I Can!
Last week we were a couple of hours away from heading to a play date and Pony Girl turned to me and said, "I want to sew a dress Mama."
"Ok," says I, "Maybe tomorrow we can try."
"No, now! I want to make a dress for my play date."
"Honey, we don't have time, we can't make a dress right now." I reply.
"Yes I can!" She says with absolute certainty.
"I'm sorry honey, we can't."
So she walks up to me, cups my face in her hands and says, "It's o.k. mom, trust me. Yes I can."
And she did!
We made a sketch, chose the fabric, had a plan and just started. She has used my sewing machine only once before to sew a simple square of fabric, but this was a whole dress! I did the ironing parts and she, this amazing kid, sewed every seam, hem, and detail on her dress! Going slow, "It is important to be careful and slow so I make less mistakes." she says. Her concentration is total. I tell her to keep the fabric straight and...and...hover. She tells me, "Mom, I got it, don't worry, relax!"
Why am I so surprised? She told me she could do it, she knew she could do it, and she did. Not only is my crafty mama's heart bursting with pride that my 7 year old made her very first dress, but my lion mama heart wants to show and tell the world what this awesome kid has done! More specifically, I want to show her 1st grade teacher. The one who said she couldn't focus, the one who wanted to wash her hands of her when she couldn't force the results she wanted out of Pony Girl, the one who said she belonged in an alternative placement classroom (I visited 2 of those classrooms) where she so very obviously did not fit the criteria, and the one who made her feel less than.
As I watch her play with her friends, overhear her say, "Sure, I can make you a dress too!" as she walks up to kids on the playground and introduces herself and asks if they want to play...I want to tell that teacher that her tremendous concern over Pony Girl's lack of social skills is entirely unfounded.
See, if you listen to them, if you trust them, if you encourage them, if you let them be themselves, if you can shift your perspective and really see them, if you believe in them - they might just believe in themselves.
Yes, I learned that from her. I keep learning how truly amazing life is, how good it can be despite all of the challenges; how sometimes when we learn how to navigate through some of those challenges, we find out we are the heroes of our own lives.
She is my hero!
Friday, June 29, 2012
Cheap, Fast and Easy: DIY Kid's Room Makeover
It was time, 7 years of purple walls (make that 'Smokey Lilac'); from babyhood, through toddler mayhem, straight on to little kid...there's bound to be a bit of grubby on them walls. It was time for a makeover. The criteria was strict; it had to be cheap, fast, and easy. It also had to be transitional, 'cause we may not be long for the little green cottage, it looks like we just might be moving on - more on that later. So there's that, and of course I had to consult Pony Girl.
She has told me that I may continue to call her Pony Girl "It's fine, whatever." But only until "The Muse strikes and something better comes along." Yeah, she said that.
She's going through a 'Red Period'. After I vetoed the red walls, I asked her for suggestions, "What do you want in your room?"
She said, "Butterflies, Surfer Girl, Animals, and Music."
The Mission:
Kid Room Makeover
Time Frame:
One Week. If you had the luxury of long uninterrupted days, you might be able to do it in 4.
Budget:
After painting expenses I allowed myself a budget of $50. If I had more time I would have lowered the budget by making more items.
The Vision:
Butterflies, Surfer Girl, Animals, and Music...and red.
O.k. I can do that; bring all those favorite things to life in one room - easy peasy. The key is color. I began by painting the walls a fresh light cream color.
Then we have the Neutrals: wood floors, wood furniture, cream and white, and a little gray. Then we bring in the main accent color RED. Then I added one more little pop of color with Turquoise.
Let's start with butterflies shall we?
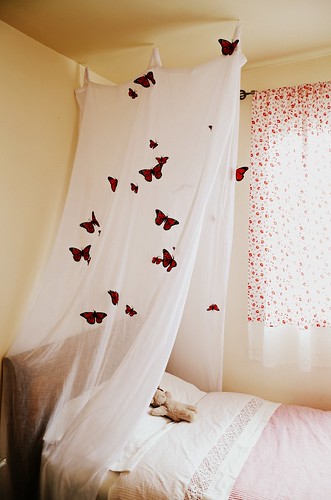
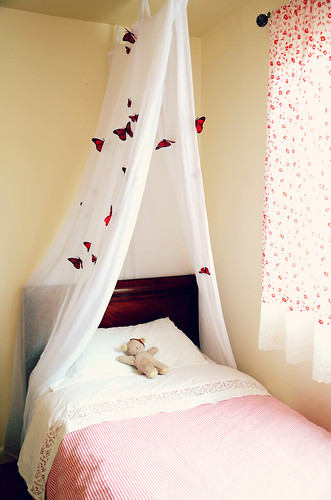
I made a sort of draping butterfly net over the bed by using 2 sheer tab top curtain panels that I had in my sewing space. I screwed a few hooks in the ceiling over the head of the bed and simply hooked the tabs onto to them. Then I found some red butterflies at my local craft store. The butterflies had long wires attached to them which I simply clipped short and stuck them into the curtain panels. Done!
If you don't have sheer curtains laying about, you could use fabric or even an old sheet cut in half length-wise, then sew some loops of ribbon to the tops. Not into butterflies? You could easily cut your preferred shapes out of felt or fabric and baste them on. Sea creatures, planets, birds, leaves, etc. would be pretty cool too!
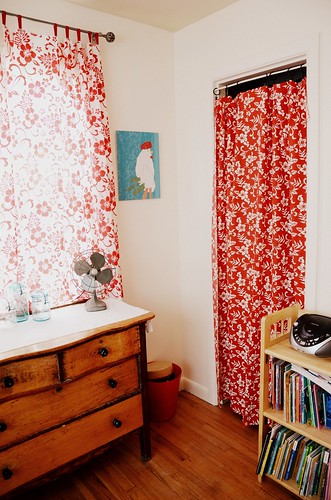
Now for 'Surfer Girl'. This was easily accomplished with a couple lengths of red and white Hawaiian fabric that I bought on the islands and have been hoarding in my stash. Now we have curtains!
For the window curtain I cut the length of fabric in half, quickly hemmed the cut ends and sewed loops to the two tops using bias tape/binding, you could use ribbon or twill tape as well. For the closet curtain I hemmed the cut ends of the fabric and used a spring loaded curtain rod with curtain clips. Done!
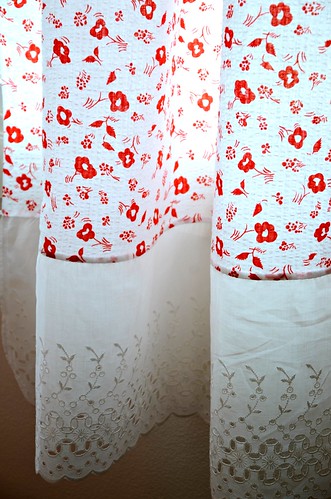
For the other window curtain it was pretty much the same process. I had some sweet white and red vintage seersucker fabric, but there wasn't quite enough to achieve the right length of curtains. So, I sewed some vintage white cotton eyelet to the bottoms of the curtain panels and Done!
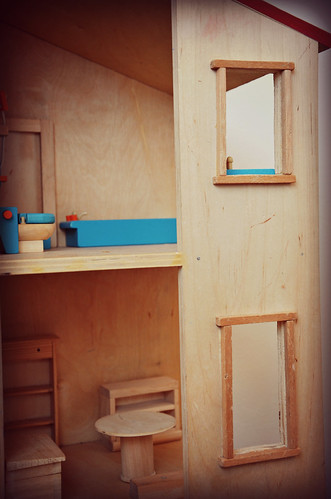
The inspiration for the Turquoise came from Pony Girl's dollhouse furniture. Plus, red and turquoise look great together.
Dollhouse handcrafted by the Engineer
Where were we? Oh yes, Animals!
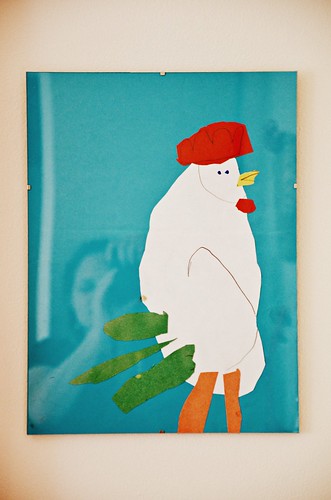
I can not tell you how much I love this chicken! Collage is one of my favorite projects to do with kids, I love the endless art that can be created. Just grab some colored paper and have at it! This picture already had the perfect color scheme and it's gorgeous; I just popped it into an old inexpensive frame I had around the house, instant art!
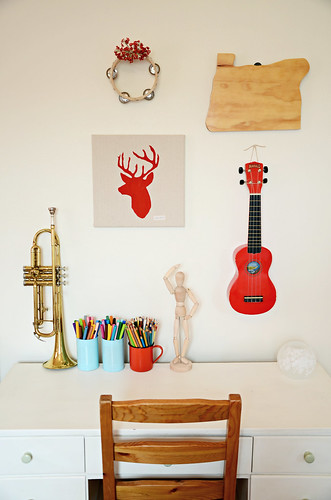
Animals and music over at the desk. The desk was originally found for free on the side of the road, given a fresh coat of paint and has plenty of drawers for storage of art supplies and such.
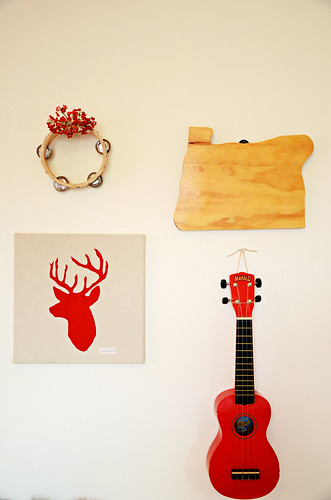
I spy 2 easy DIY projects. The wooden cut out of the state of Oregon was made by a family member. Simply trace your state, province, continent, onto a piece of wood, cut out with a jig saw, a little sanding and varnish and you got cool art!
I made the deer head by stenciling fabric paint onto a square of fabric scrap and stretched it over a cheap artist canvas and used a staple gun to secure it in place.
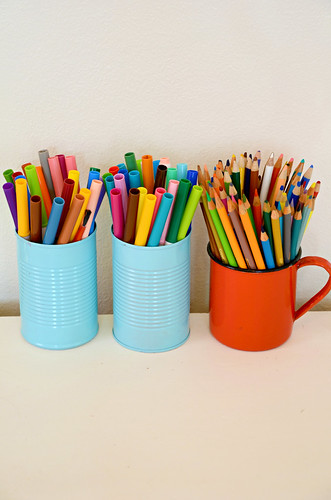
And of course I never tire of finding uses for spray painted food tins.
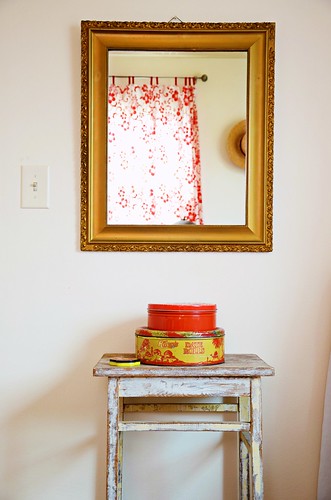
Next to the bed I placed an old end table with my grandmother's mirror. I used some vintage tins on the table to hold her rock and found treasure collections. Below the table is an old school locker basket to hold all of the current library books in one place (I realize that this may be a dream in the straw, but I'm hoping there will be less mad scrambling to find our library books come the due dates.)
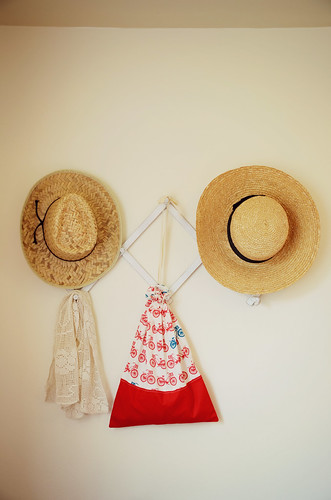
My Turquoise weekend bag was sacrificed to Barbie storage. An old collapsible peg rack found at the local thrift for $1.50 was ugly, but nothing a little paint couldn't fix.
Galvanized tubs at the foot of the bed make for great toy storage. You could hunt down some great baskets from a thrift store too.
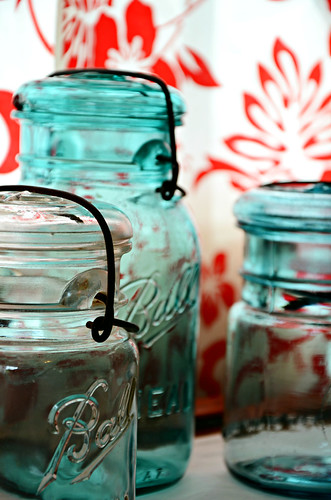
And a little extra pop of color on the dresser with my grandmother's blue canning jars will become storage for my girl's bead collection.
So, what I bought for the makeover:
Butterflies from the craft store $7.00
Galvanized Storage Tubs from the big home hardware store $15.00
Hat Rack from the local thrift $1.50
I splurged on a new muted red and white stripe Duvet cover from Ikea since I didn't have time to make my own $15.00
Grand Total: $38.50
Not too shabby!
I hope that maybe some of these Cheap, Fast, and Easy DIY ideas have inspired you!
Do you have any Cheap, Fast, and Easy DIY projects that you love?
She has told me that I may continue to call her Pony Girl "It's fine, whatever." But only until "The Muse strikes and something better comes along." Yeah, she said that.
She's going through a 'Red Period'. After I vetoed the red walls, I asked her for suggestions, "What do you want in your room?"
She said, "Butterflies, Surfer Girl, Animals, and Music."
The Mission:
Kid Room Makeover
Time Frame:
One Week. If you had the luxury of long uninterrupted days, you might be able to do it in 4.
Budget:
After painting expenses I allowed myself a budget of $50. If I had more time I would have lowered the budget by making more items.
The Vision:
Butterflies, Surfer Girl, Animals, and Music...and red.
O.k. I can do that; bring all those favorite things to life in one room - easy peasy. The key is color. I began by painting the walls a fresh light cream color.
Then we have the Neutrals: wood floors, wood furniture, cream and white, and a little gray. Then we bring in the main accent color RED. Then I added one more little pop of color with Turquoise.
Let's start with butterflies shall we?
I made a sort of draping butterfly net over the bed by using 2 sheer tab top curtain panels that I had in my sewing space. I screwed a few hooks in the ceiling over the head of the bed and simply hooked the tabs onto to them. Then I found some red butterflies at my local craft store. The butterflies had long wires attached to them which I simply clipped short and stuck them into the curtain panels. Done!
If you don't have sheer curtains laying about, you could use fabric or even an old sheet cut in half length-wise, then sew some loops of ribbon to the tops. Not into butterflies? You could easily cut your preferred shapes out of felt or fabric and baste them on. Sea creatures, planets, birds, leaves, etc. would be pretty cool too!
Now for 'Surfer Girl'. This was easily accomplished with a couple lengths of red and white Hawaiian fabric that I bought on the islands and have been hoarding in my stash. Now we have curtains!
For the window curtain I cut the length of fabric in half, quickly hemmed the cut ends and sewed loops to the two tops using bias tape/binding, you could use ribbon or twill tape as well. For the closet curtain I hemmed the cut ends of the fabric and used a spring loaded curtain rod with curtain clips. Done!
For the other window curtain it was pretty much the same process. I had some sweet white and red vintage seersucker fabric, but there wasn't quite enough to achieve the right length of curtains. So, I sewed some vintage white cotton eyelet to the bottoms of the curtain panels and Done!
The inspiration for the Turquoise came from Pony Girl's dollhouse furniture. Plus, red and turquoise look great together.
Dollhouse handcrafted by the Engineer
Where were we? Oh yes, Animals!
I can not tell you how much I love this chicken! Collage is one of my favorite projects to do with kids, I love the endless art that can be created. Just grab some colored paper and have at it! This picture already had the perfect color scheme and it's gorgeous; I just popped it into an old inexpensive frame I had around the house, instant art!
Animals and music over at the desk. The desk was originally found for free on the side of the road, given a fresh coat of paint and has plenty of drawers for storage of art supplies and such.
I spy 2 easy DIY projects. The wooden cut out of the state of Oregon was made by a family member. Simply trace your state, province, continent, onto a piece of wood, cut out with a jig saw, a little sanding and varnish and you got cool art!
I made the deer head by stenciling fabric paint onto a square of fabric scrap and stretched it over a cheap artist canvas and used a staple gun to secure it in place.
And of course I never tire of finding uses for spray painted food tins.
Next to the bed I placed an old end table with my grandmother's mirror. I used some vintage tins on the table to hold her rock and found treasure collections. Below the table is an old school locker basket to hold all of the current library books in one place (I realize that this may be a dream in the straw, but I'm hoping there will be less mad scrambling to find our library books come the due dates.)
My Turquoise weekend bag was sacrificed to Barbie storage. An old collapsible peg rack found at the local thrift for $1.50 was ugly, but nothing a little paint couldn't fix.
Galvanized tubs at the foot of the bed make for great toy storage. You could hunt down some great baskets from a thrift store too.
And a little extra pop of color on the dresser with my grandmother's blue canning jars will become storage for my girl's bead collection.
So, what I bought for the makeover:
Butterflies from the craft store $7.00
Galvanized Storage Tubs from the big home hardware store $15.00
Hat Rack from the local thrift $1.50
I splurged on a new muted red and white stripe Duvet cover from Ikea since I didn't have time to make my own $15.00
Grand Total: $38.50
Not too shabby!
I hope that maybe some of these Cheap, Fast, and Easy DIY ideas have inspired you!
Do you have any Cheap, Fast, and Easy DIY projects that you love?
Tuesday, June 26, 2012
Silly old bear
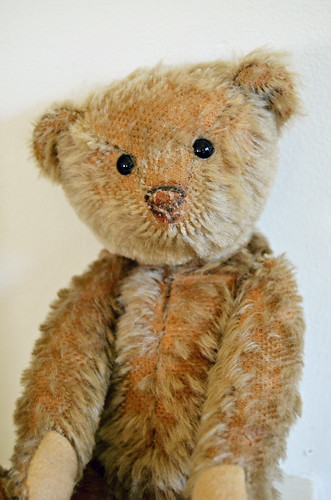
Meet Mr. Whiskers

Sometimes you get lucky and meet someone through this wild and wonderful world of bloggers that becomes a fast friend, even though you may be geographically challenged and sharing a cuppa face to face is not possible, you feel as though you have known each other for ages. I have been so lucky in this respect, I feel as though I have received a gift of great bounty in friends from far away places. The fact that these friends are also incredibly talented, terribly creative, and makers of magical things, is truly inspiring.
Jess from Teddy Bear's Wednesday is one such remarkable friend. She is a maker of extraordinary creatures, most notably of the bear variety, but she is hardly limited to just one species. You can take one look at her Etsy shop to see she has a gift for creating critters with personality and panache!

One day whilst perusing her instagram feed, I spied the beginnings of a bear, he was just a head at this point, but I knew he was going to be quite special. Later I saw that she had posted about him on her blog and I knew he had to come live with me. So, I promptly put in my application for adoption and was thrilled to be accepted. Fashioned after the old Steiff bears, Jess hand dyes the mohair, stitches all by hand, meticulously ages the bear and gives each one his/her own unique personality.
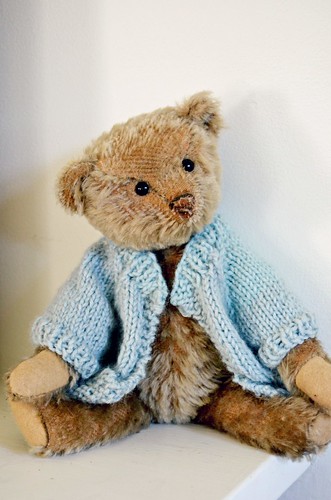
This is Mr. Whiskers settling in to his new home having a bit of jet lag and a laugh with an old straw hat he found in one of my closets.

Here is what Jess had to say about him:
"The moment Mr Whiskers became a head, i knew he was a Pop, he was a bit of an old man bear. And as he grew into more and more of a whole bear, i knew that he He likes his mocassins, his cups of teas with 4 sugars, tinkering in his shed and is a bit of a dunker ( biscuits/cookies in tea).
That every Saturday he likes to buy a lotto ticket, he's a long suffering Richmond supporter and is fond of the ocassional punt on the horses."

I have since discovered that his first name is Otis and he is a brilliant addition to the little green cottage. From the moment I held him in my hands, the perfect feel and weight of him, his funny old pop ways, his blue cardi...well, it was love.
Thank you Jess, you are an artist!
Oh, and we may be having that cuppa face to face after all!
Sometimes you get lucky and meet someone through this wild and wonderful world of bloggers that becomes a fast friend, even though you may be geographically challenged and sharing a cuppa face to face is not possible, you feel as though you have known each other for ages. I have been so lucky in this respect, I feel as though I have received a gift of great bounty in friends from far away places. The fact that these friends are also incredibly talented, terribly creative, and makers of magical things, is truly inspiring.
Jess from Teddy Bear's Wednesday is one such remarkable friend. She is a maker of extraordinary creatures, most notably of the bear variety, but she is hardly limited to just one species. You can take one look at her Etsy shop to see she has a gift for creating critters with personality and panache!
One day whilst perusing her instagram feed, I spied the beginnings of a bear, he was just a head at this point, but I knew he was going to be quite special. Later I saw that she had posted about him on her blog and I knew he had to come live with me. So, I promptly put in my application for adoption and was thrilled to be accepted. Fashioned after the old Steiff bears, Jess hand dyes the mohair, stitches all by hand, meticulously ages the bear and gives each one his/her own unique personality.
This is Mr. Whiskers settling in to his new home having a bit of jet lag and a laugh with an old straw hat he found in one of my closets.
Here is what Jess had to say about him:
"The moment Mr Whiskers became a head, i knew he was a Pop, he was a bit of an old man bear. And as he grew into more and more of a whole bear, i knew that he He likes his mocassins, his cups of teas with 4 sugars, tinkering in his shed and is a bit of a dunker ( biscuits/cookies in tea).
That every Saturday he likes to buy a lotto ticket, he's a long suffering Richmond supporter and is fond of the ocassional punt on the horses."
I have since discovered that his first name is Otis and he is a brilliant addition to the little green cottage. From the moment I held him in my hands, the perfect feel and weight of him, his funny old pop ways, his blue cardi...well, it was love.
Thank you Jess, you are an artist!
Oh, and we may be having that cuppa face to face after all!
Monday, June 25, 2012
Hello Monday Mail Call
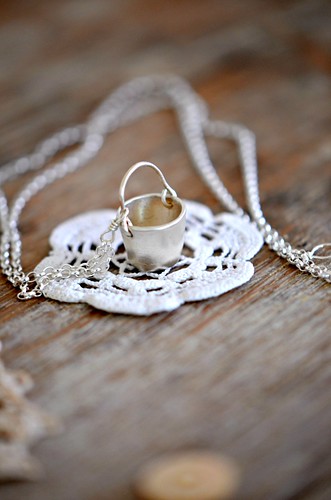
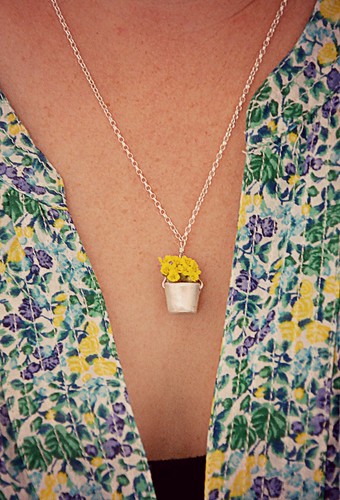
Silver pail necklace from Silverpebble Jewelry
There has been some rather exciting mail coming in to the little green cottage recently. There is nothing quite like receiving a parcel in the post, savoring the opening of the package and seeing the magical things inside. Since I began this blog, I have received such amazing things from far away places and fabulous friends. Hooray for that!
First, let me tell you, it was quite a thrill to get a note from the lovely Emma Mitchell of Silverpebble asking me to make a prairie dress for her sweet girl. Would I? Oh indeed I would! We came to the amicable arrangement of a swap, such a good idea you know considering she makes the prettiest jewelry. Oh, and did you hear? She was featured in Country Living Magazine UK along with her wonderful studio and garden!
While I sewed away here in the verdant green of the Northwest United States, she created away over there "on the edge of the watery fens in England." Off went our packages across the sea and landed on each other's doorsteps within a few days of one another.
I could not be happier. I spied this little silver pail necklace some time ago and I was smitten. It is gorgeous and a little quirky so of course I wanted it. Now I have one of my very own made with love and care by Emma. She was very kind and sent along a few little extras in the way of wee vintage doilies and buttons, yes I think she knew just what I would like.
Please go take a look at the Silverpebble shop, she has a whole array of beautiful jewelry to choose from.
I wish I lived down the lane from her, and not just to hang about in her garden and studio, as she also teaches workshops!
Thank you so much Emma! I love my necklace and so enjoyed our swap!
I'll be back tomorrow with another bit of truly magical mail.
Friday, June 22, 2012
Oh Hello Friday
Of course this means that today is all about laundry, mountains of it. I'm afraid that there is also an empty pantry and fridge that are challenging me to create some sort of supper out of wiggly jiggly carrots and Dijon mustard. Fortunately for my clan, I do happen to have the local pizza parlor on speed dial. I know, I know, I should be winging it to the grocery and making some sort of nourishing soup and home baked bread, but my friends, I must choose my battles and the laundry wins because I can sit down for the folding part. This is good because a lightheaded fog still lingers.
The good news is my camera lens has arrived and I can take pictures again, and oh what things I have to show you! There has been some very exciting mail and I hope to show a bit of the room makeover with a DIY you might like to try.
Until then my friends, have a lovely weekend!
Friday, June 15, 2012
Second Hand Hand Made
On my travels this last weekend, I managed to pop into a couple of second hand stores, 'Junk Shops' my mother used to call them. It was she who introduced me to the pleasures of thrifted goodness way back once upon a time. And rather than subject you to a multitude of macro shots of mint, lavender, and yarrow with the occasional wee spider thrown in (as I wait for my new camera lens to arrive), I thought I'd show off my finds using a clunky old lens from days of yore. I don't think camera lenses are meant to make a "ka-chunk" or a "rattle-clink" and also a "wheezing-grind" - still I did manage a couple of shots.
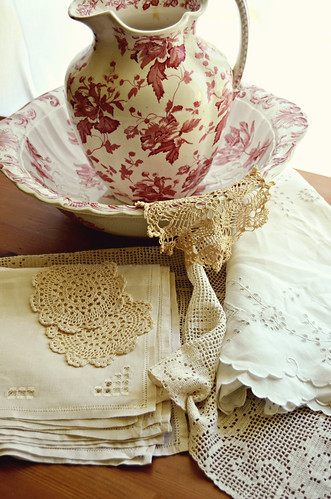
In Lafayette I poked my head into a funny old place with racks of 1980's clothing, overpriced black wrought iron bar stools (also from the 80's I think), and various doo-dahs in ramshackle piles. My eagle eye spotted something delicate and lacy way back in one corner, and there in a basket shaped like a gondola was a sweet collection of vintage hand made doilies, runners, linen napkins, and table cloth. So, for a very satisfactory price they made their way home with me.
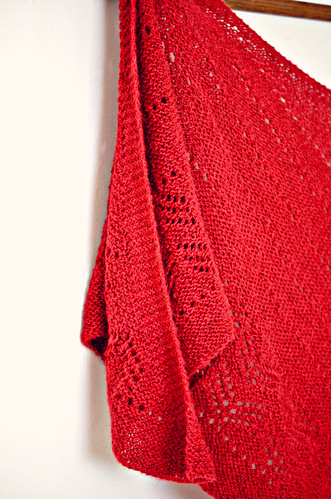
At the beach my first stop is always the local thrift, where at first I despaired of finding my usual weekend sweater and book of pulp fiction. Then I spied a flash of red peeking out from the used towel section. Lo and Behold! A beautiful hand knit shawl made from the most gorgeous of crimson wool, be still my heart! Oh and did I mention, $2!
All in all a nice bit of treasure. Hurrah for second hand hand made!
Have you found any treasures recently, I'd love to know!
Subscribe to:
Posts (Atom)